How to wrap text in Excel - In 5 minutes or less

Wrapping text in Excel is essential for making data more readable, especially when working with long text entries. This guide covers all methods to wrap text in Excel across various platforms, including Windows, Mac, iOS, and Android.
We've added screenshots with markers to make this guide super easy to follow.
Utilizing this feature ensures all content remains visible within its respective cell, enhancing both readability and presentation.
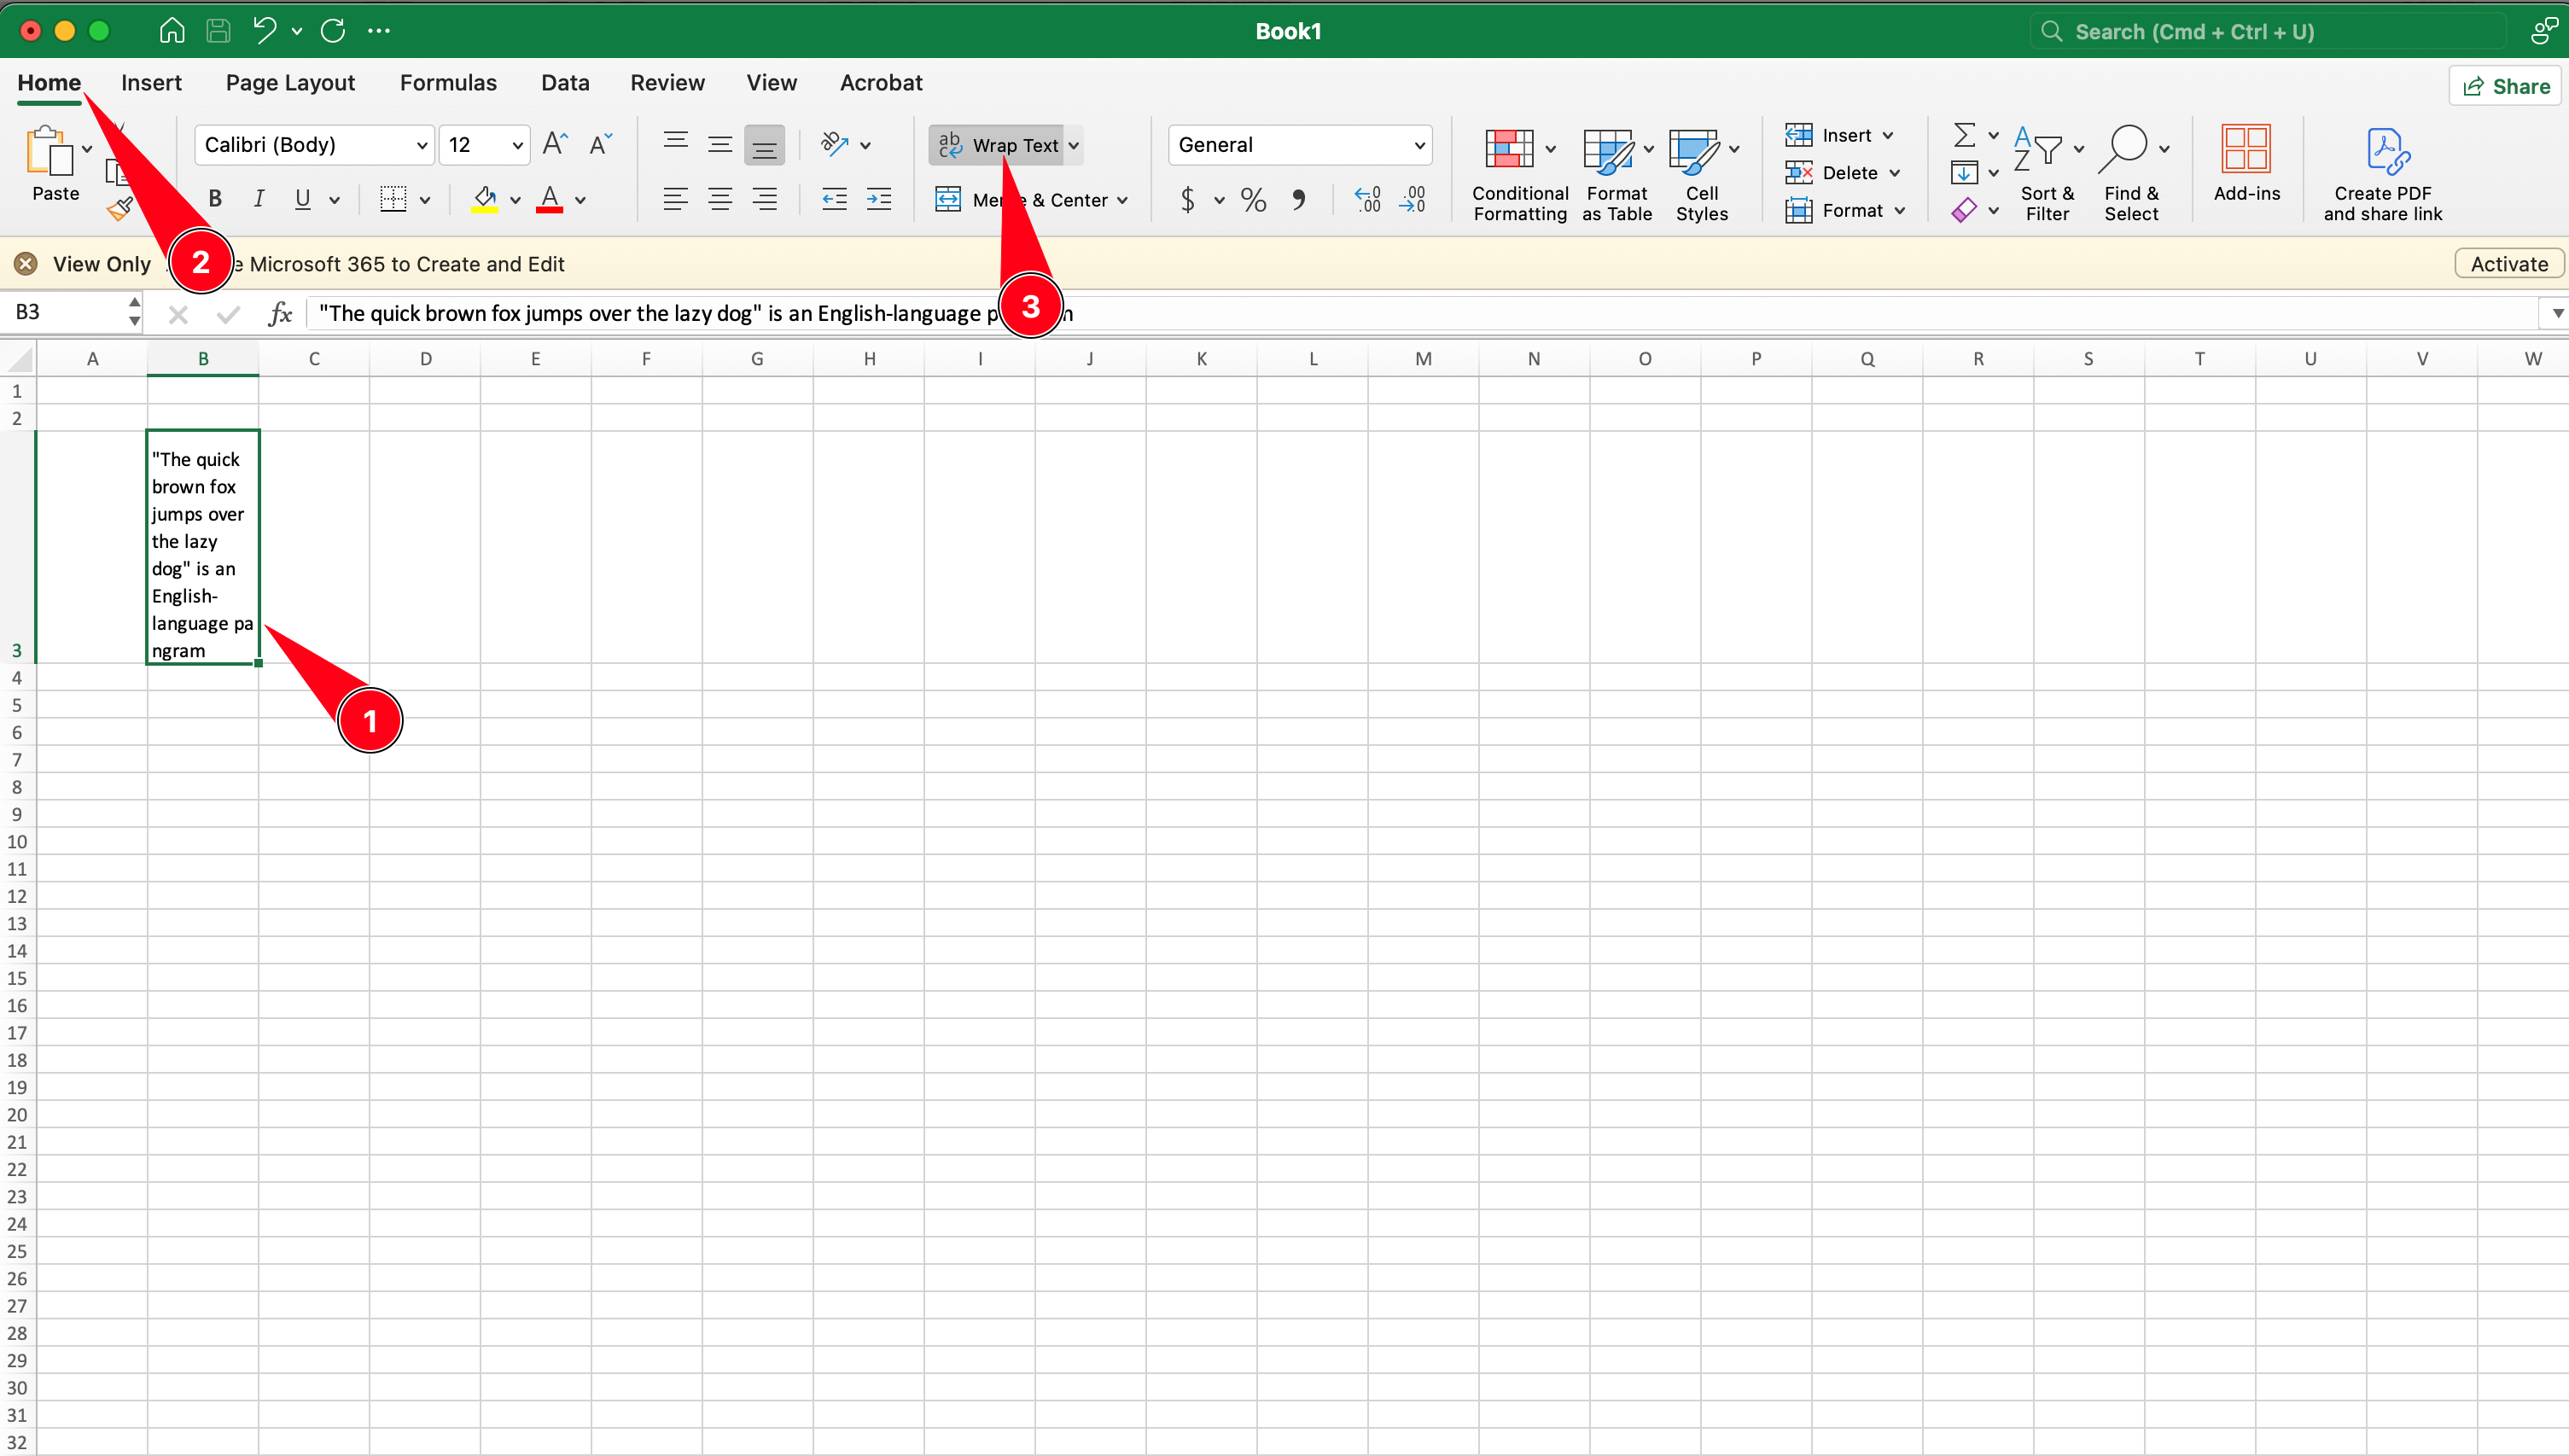
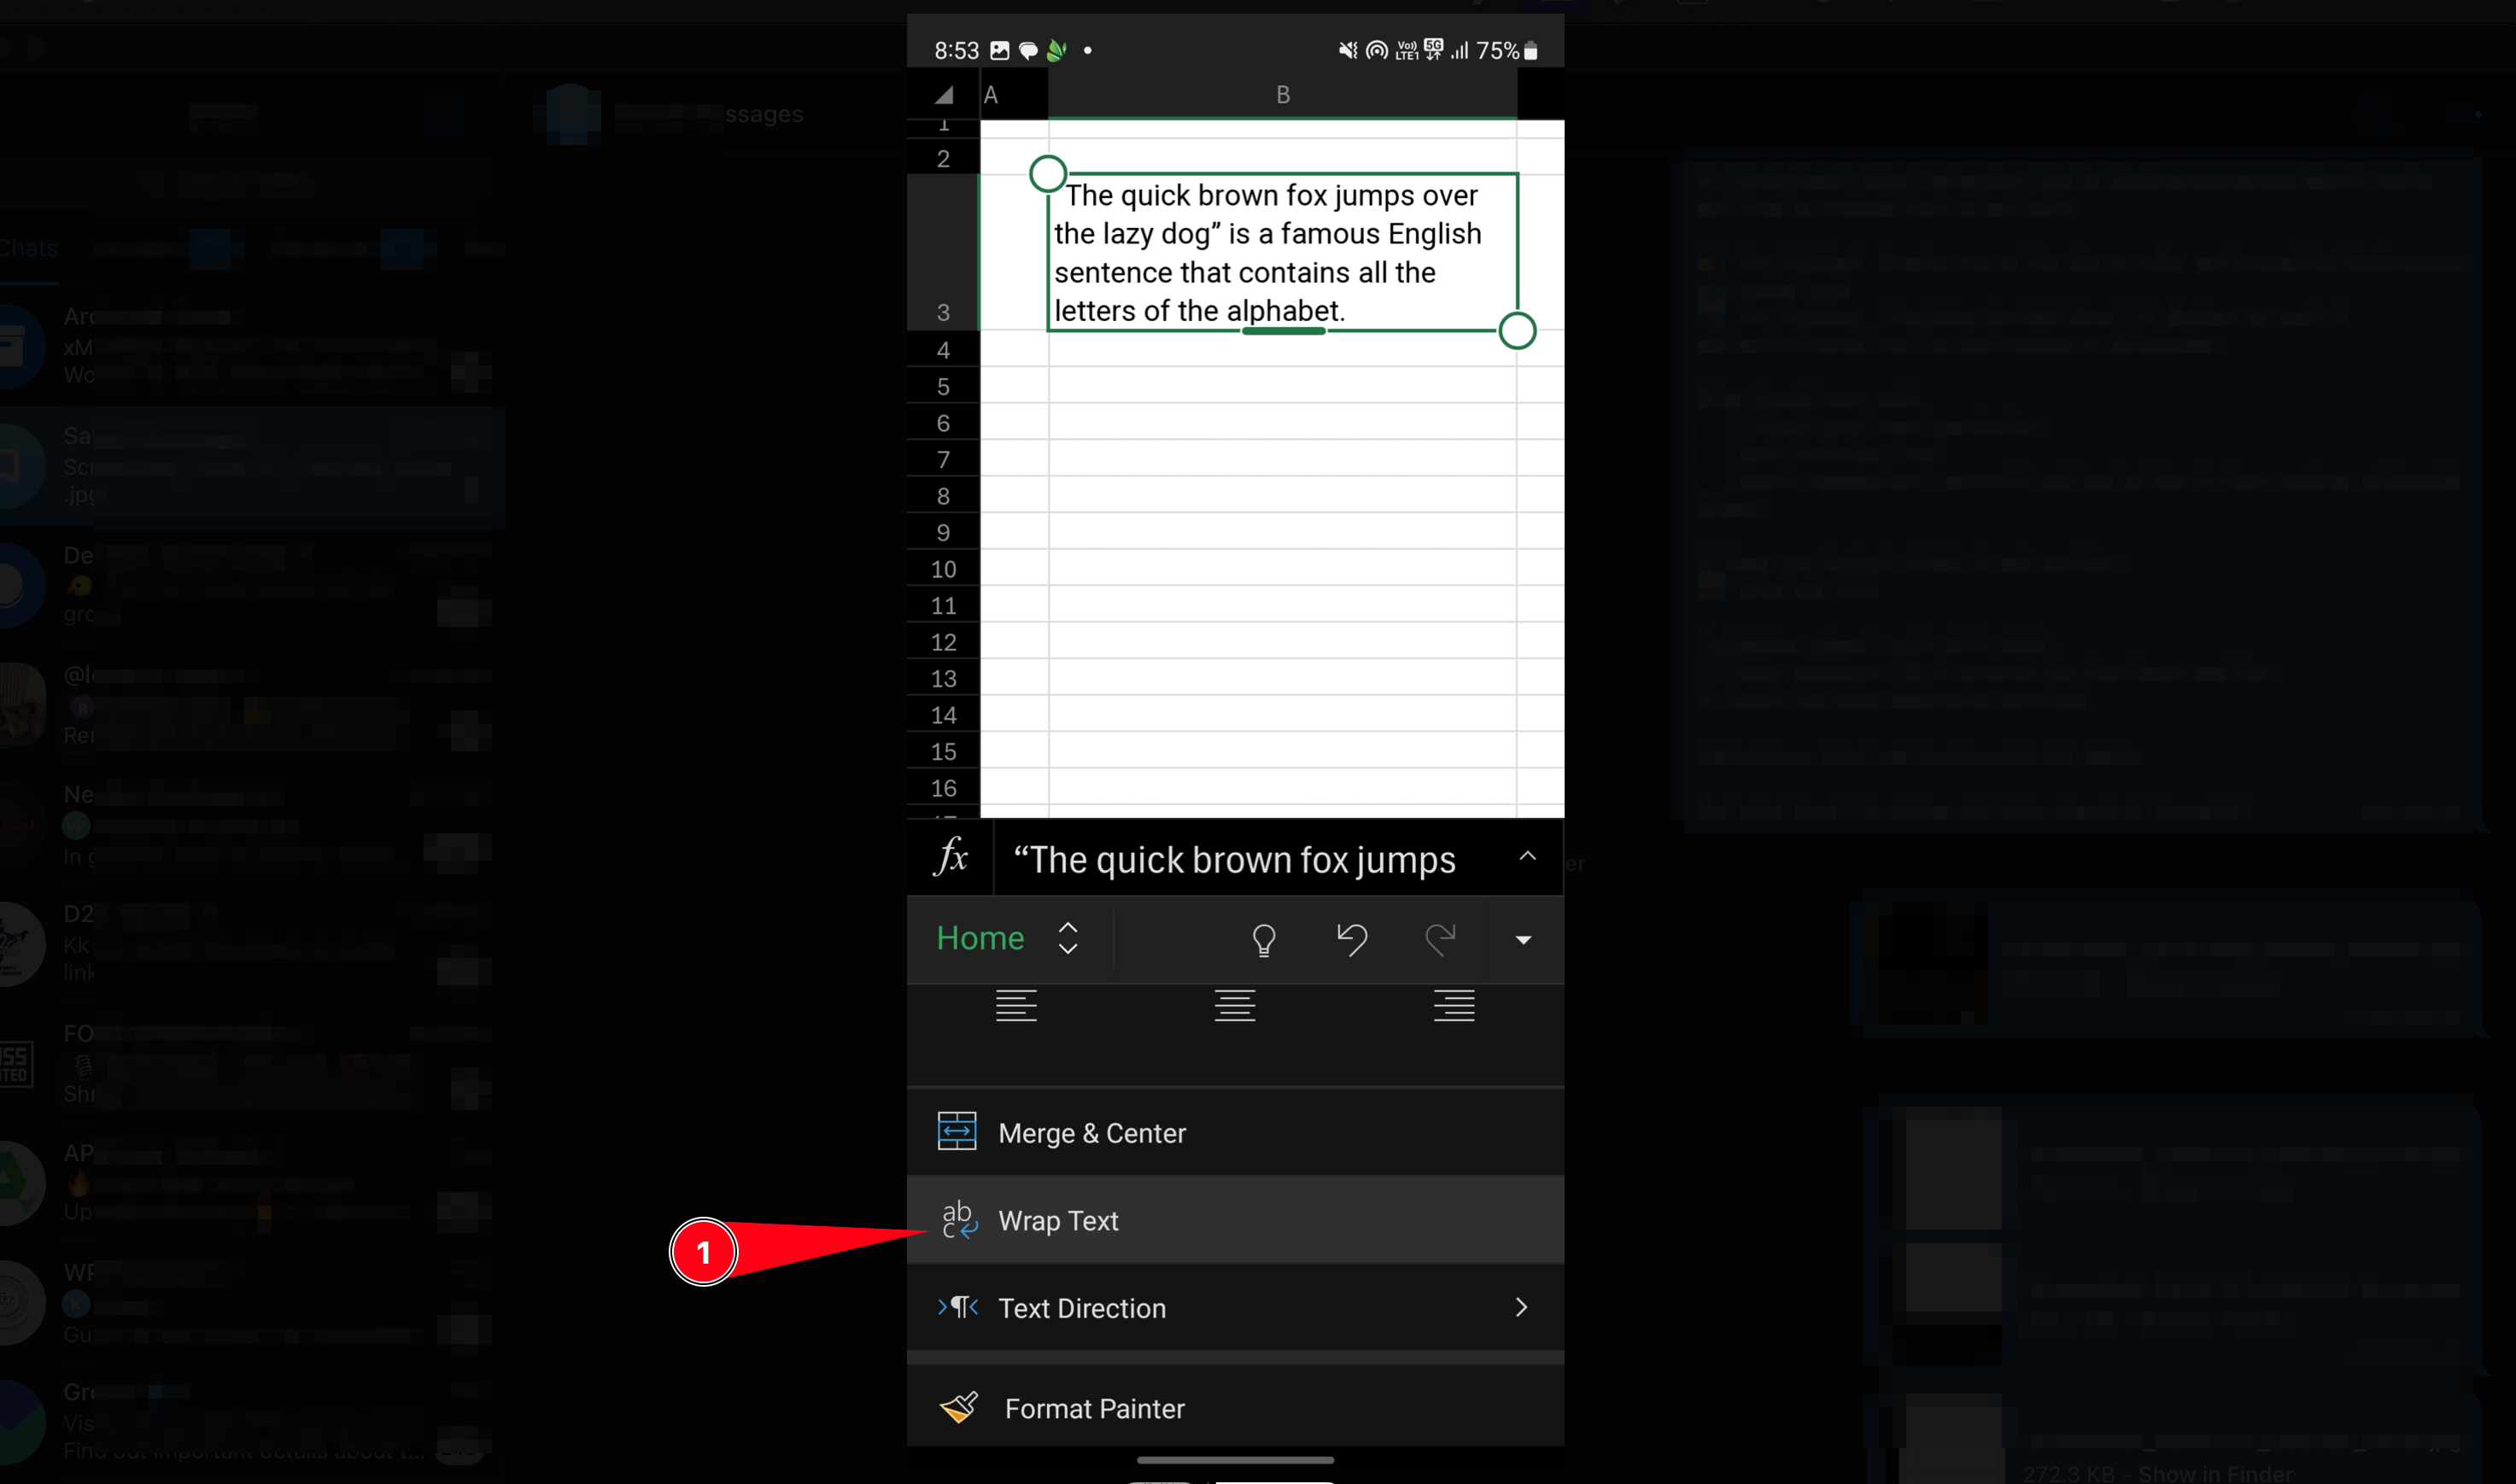
- Select the cell(s) with text you want to wrap.
- Go to the Home tab.
- In the Alignment group, click Wrap Text.
- Select the cell(s).
- Press
Alt + H + W.
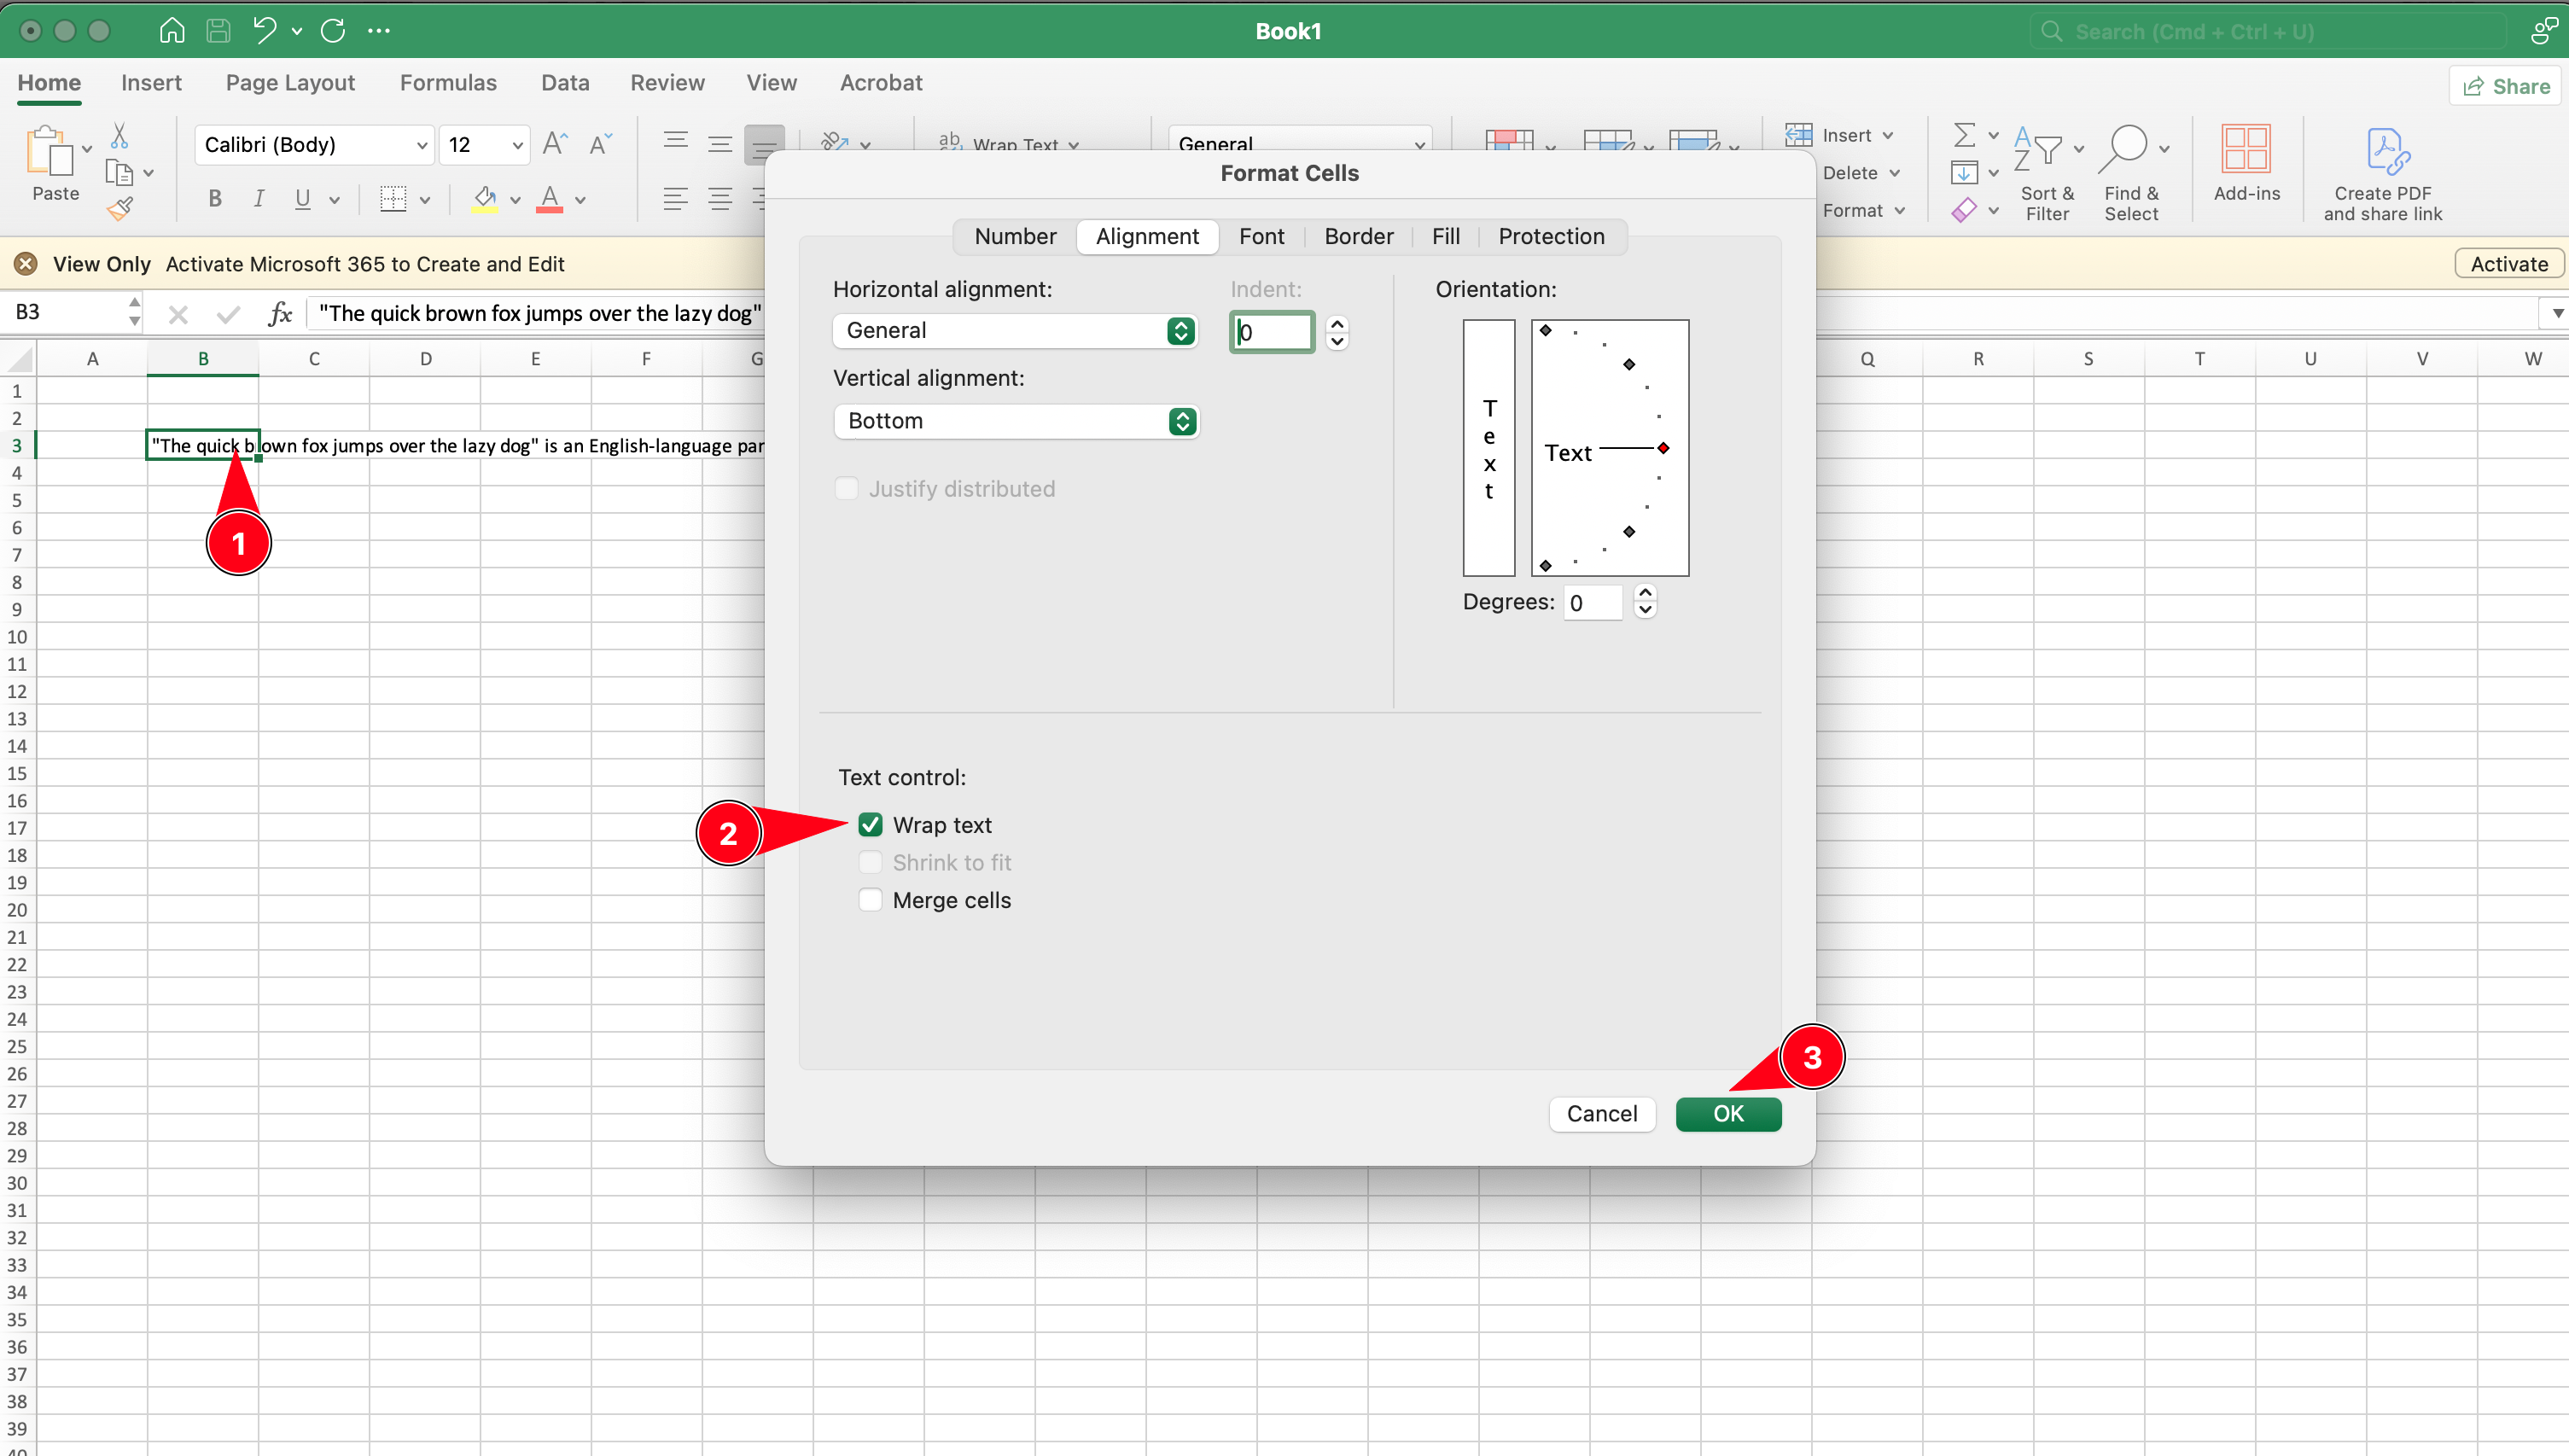
- Select the desired cell(s).
- Right-click and choose Format Cells, or press
Ctrl + 1. - In the Alignment tab, check Wrap text.
- Click OK.
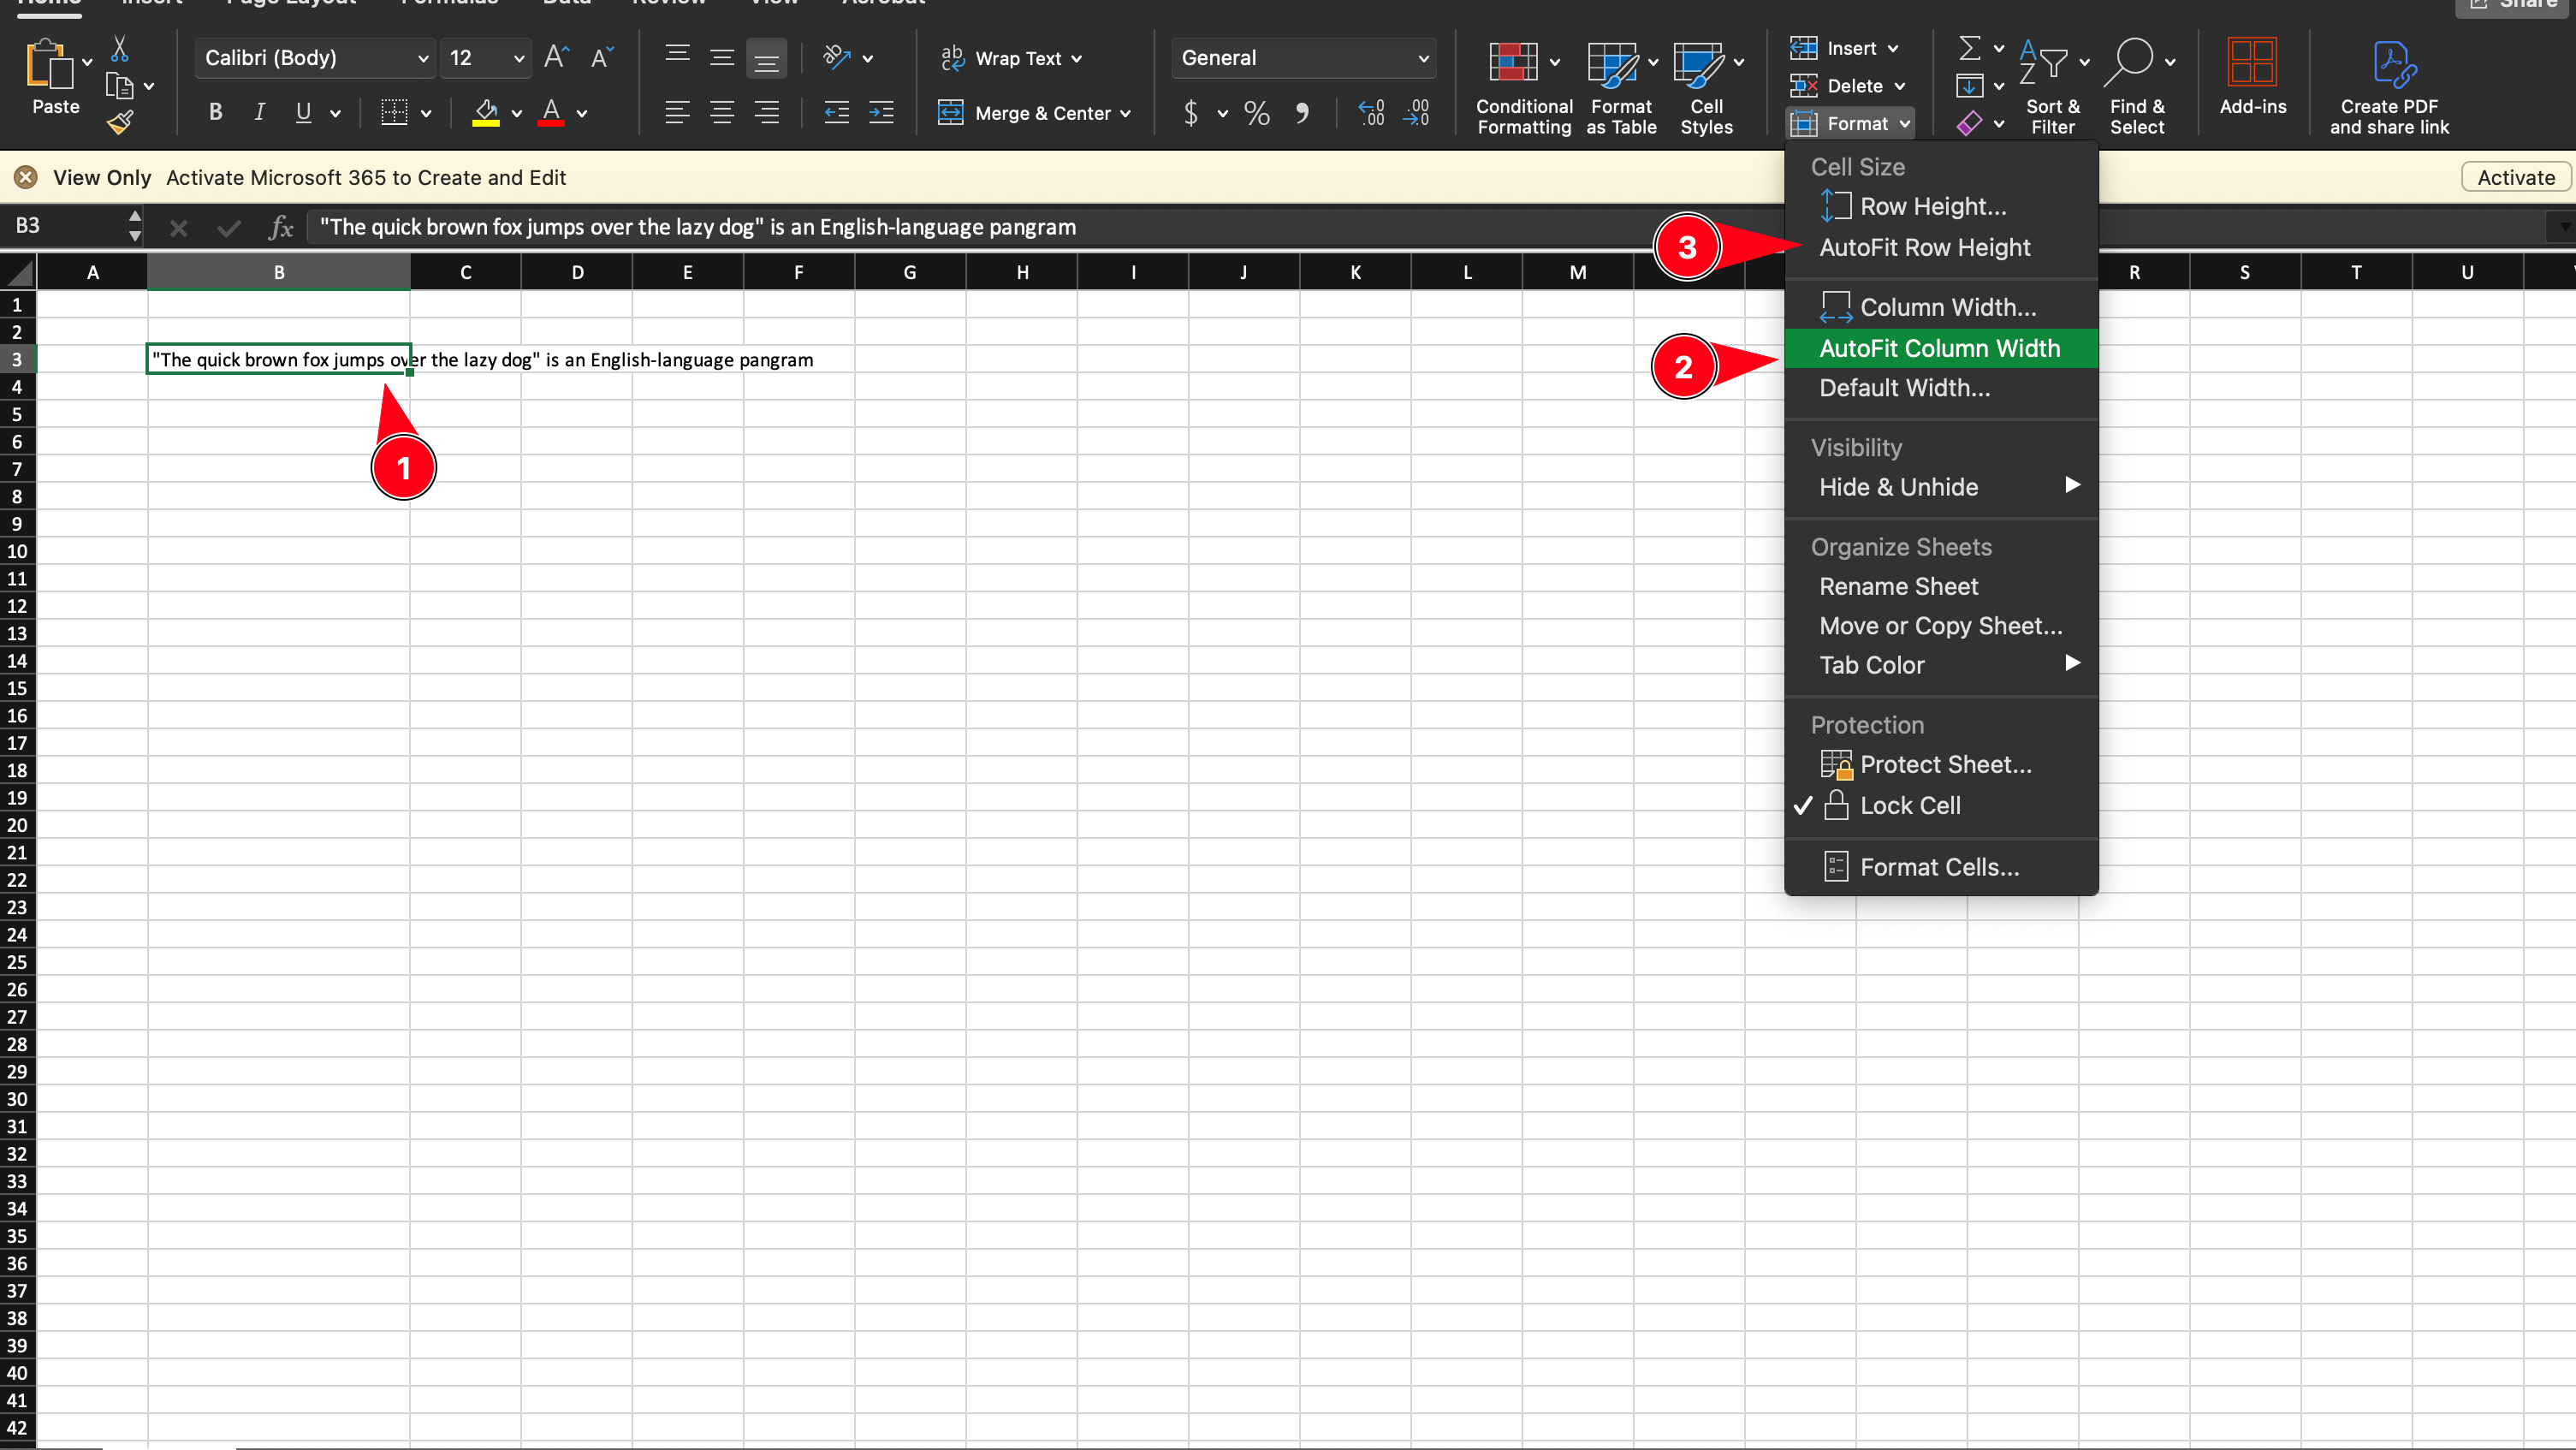
- After wrapping, ensure the text is visible:
- Select the row(s).
- On the Home tab, go to Format in the Cells group.
- Choose AutoFit Row Height.
If you prefer a video, here's a tutorial on how to wrap text in Excel
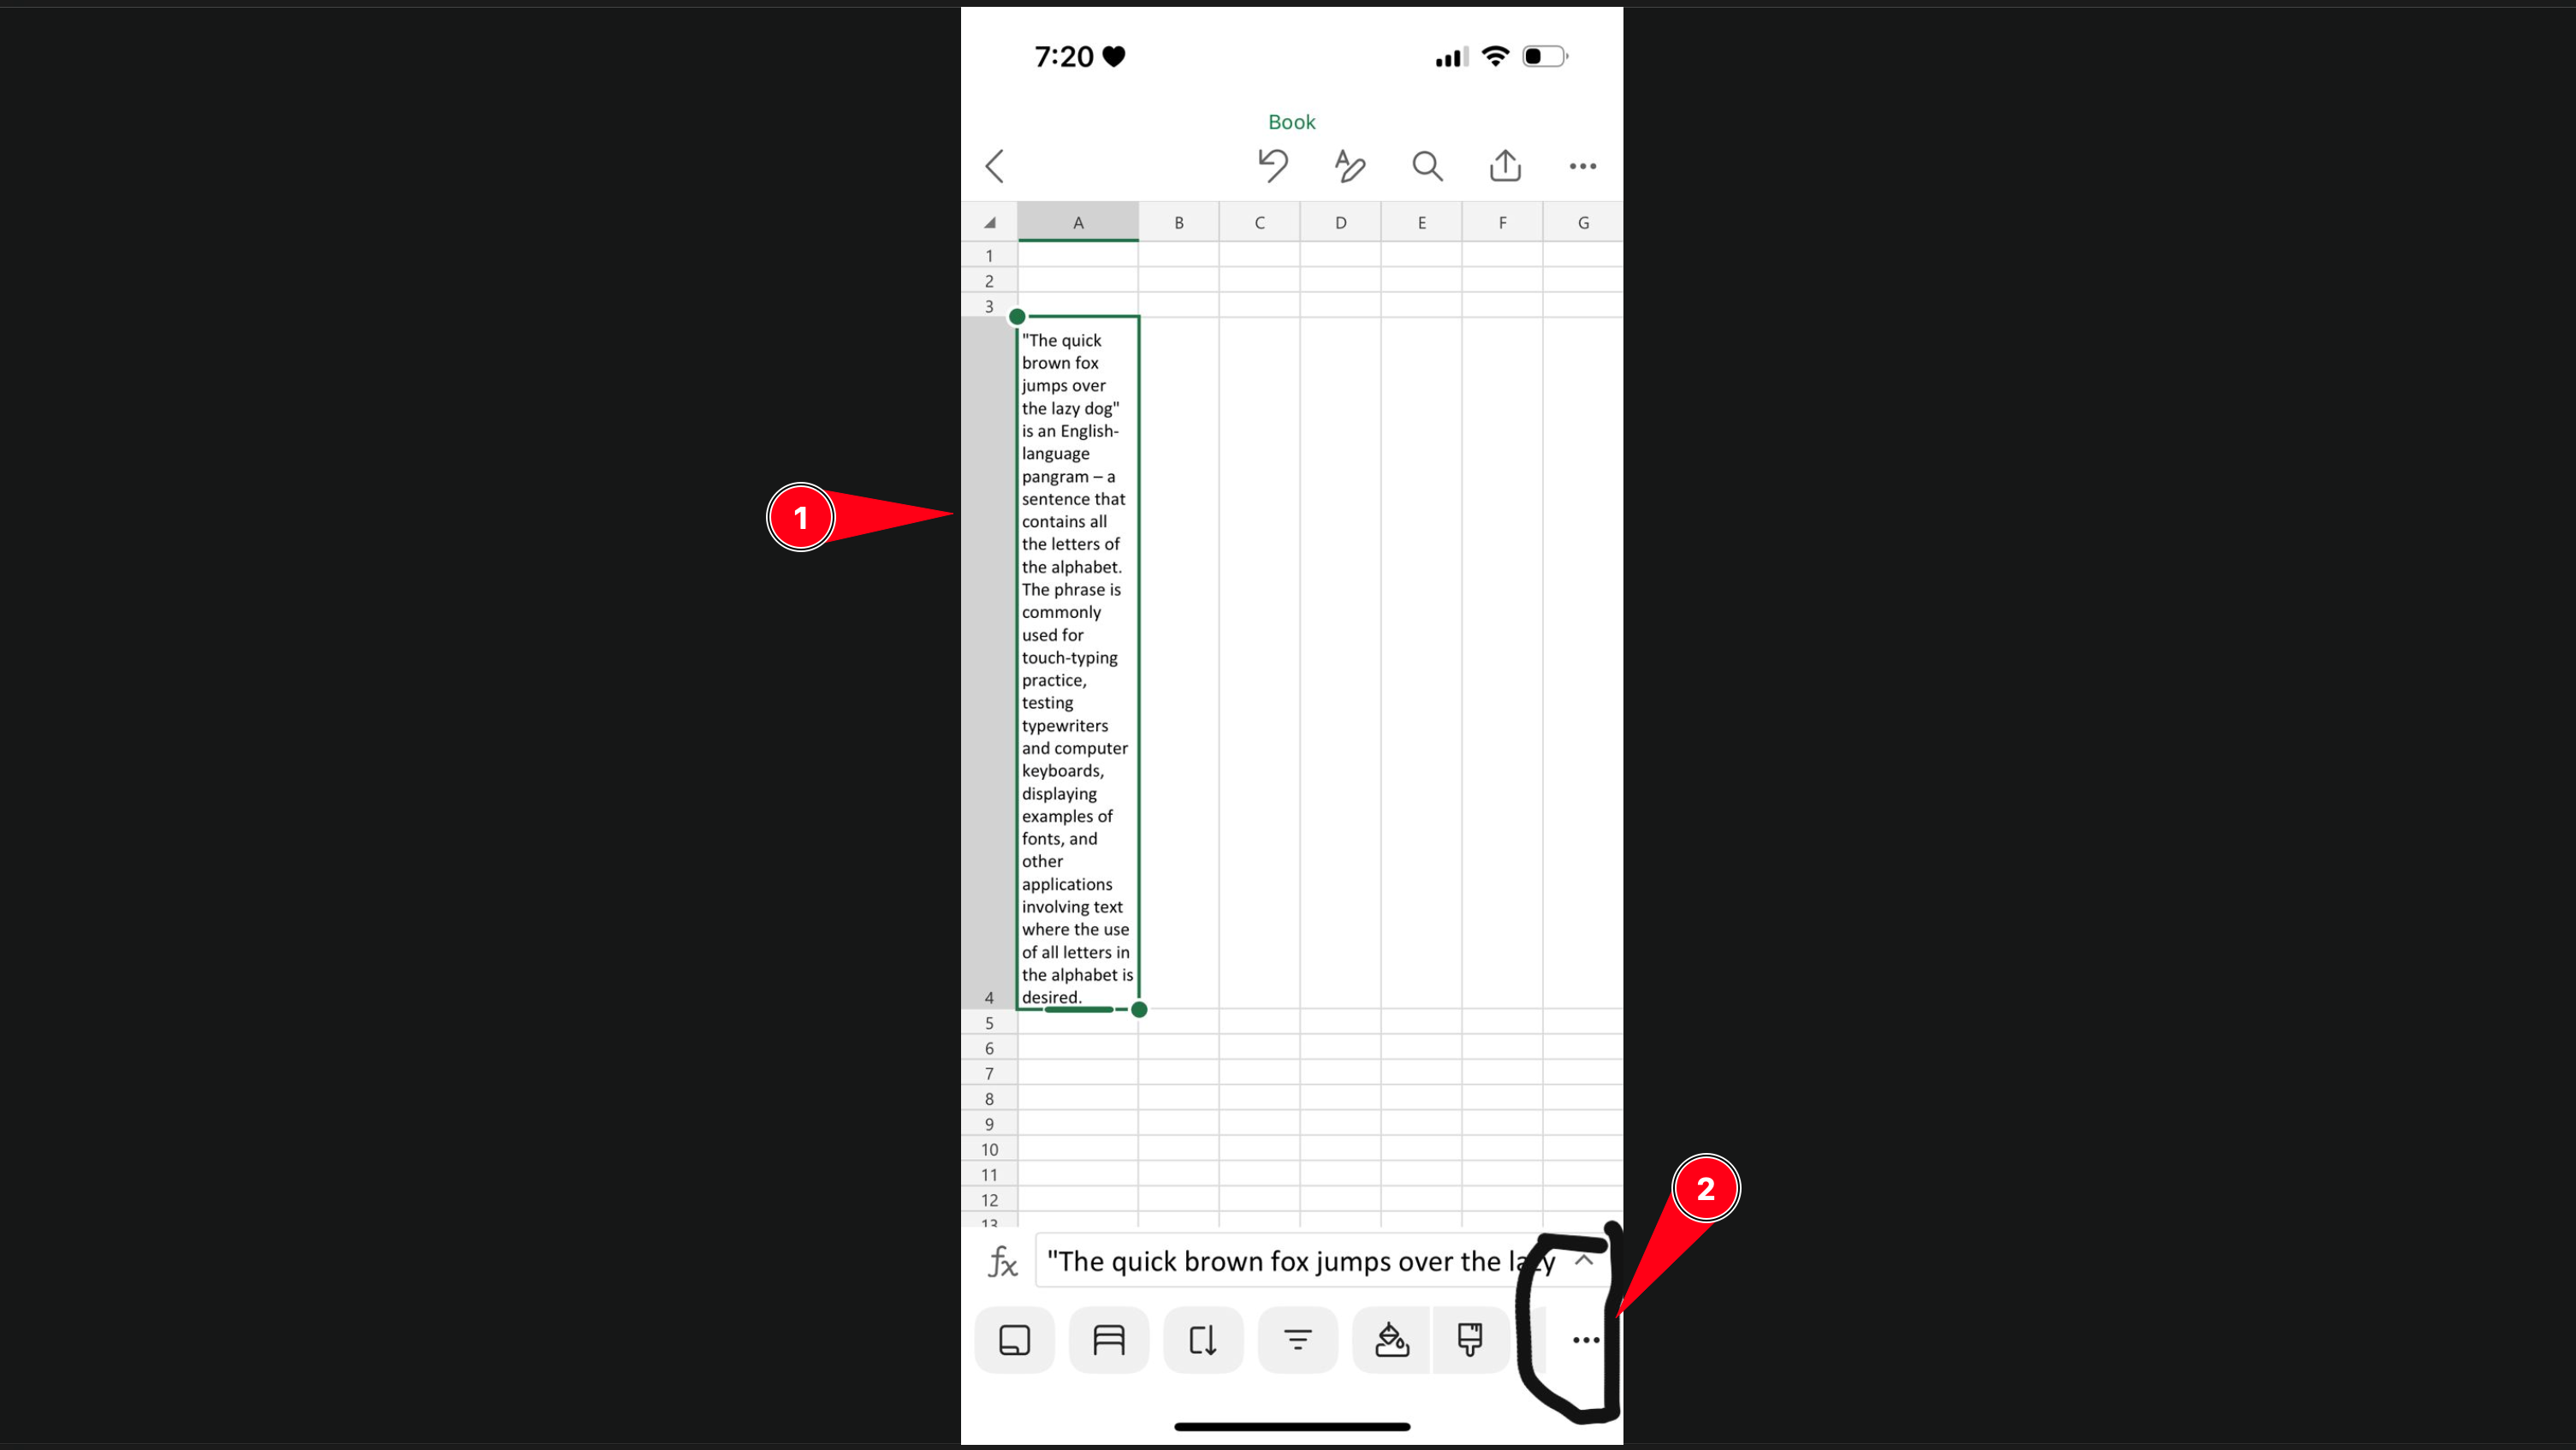
- Double-click the cell to edit.
- Place the cursor where you want the text to break.
- Press
Alt + Enterto add a line break.
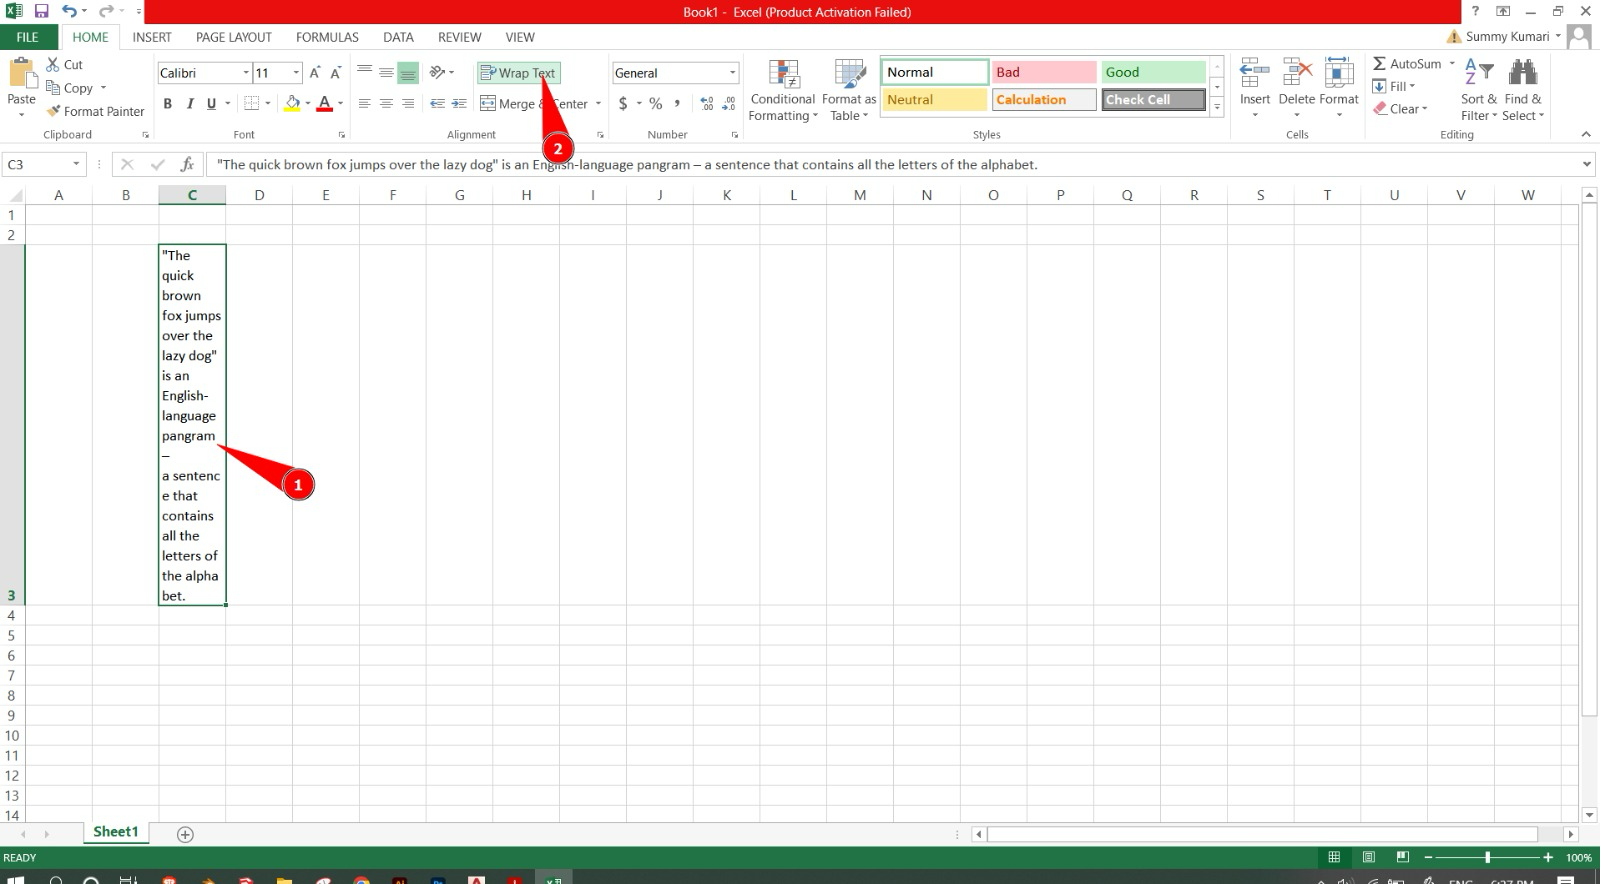
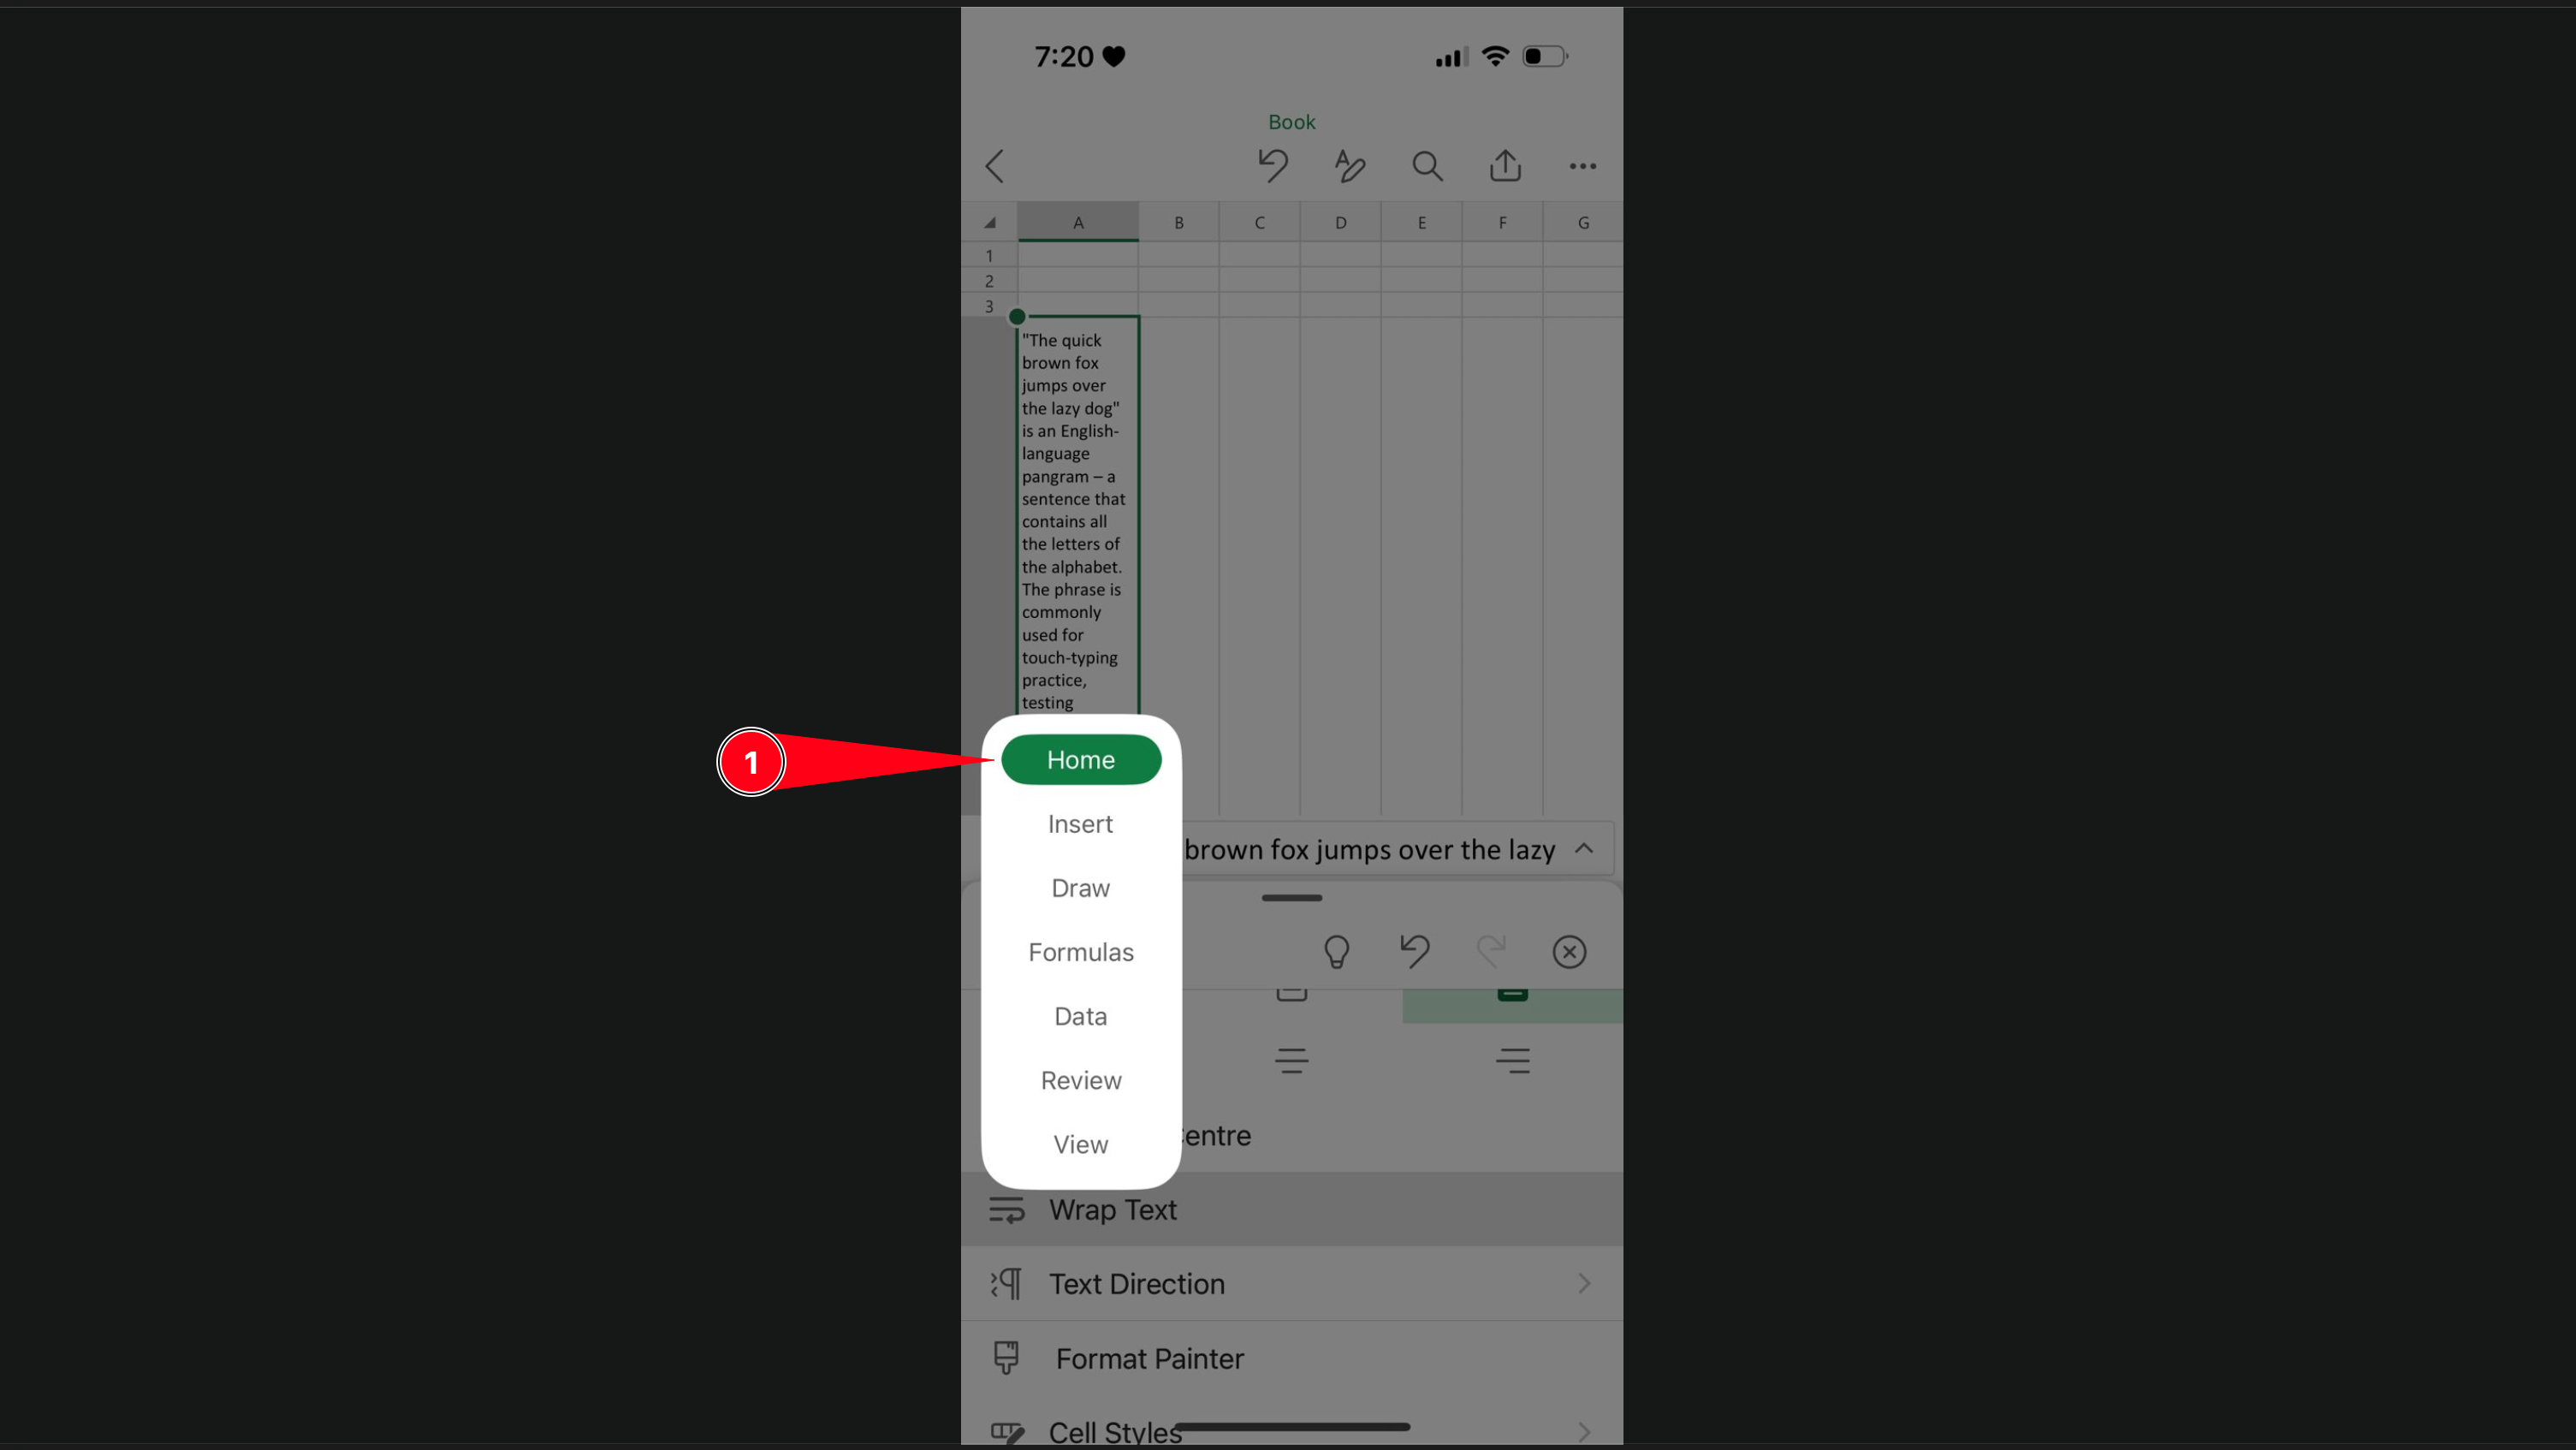
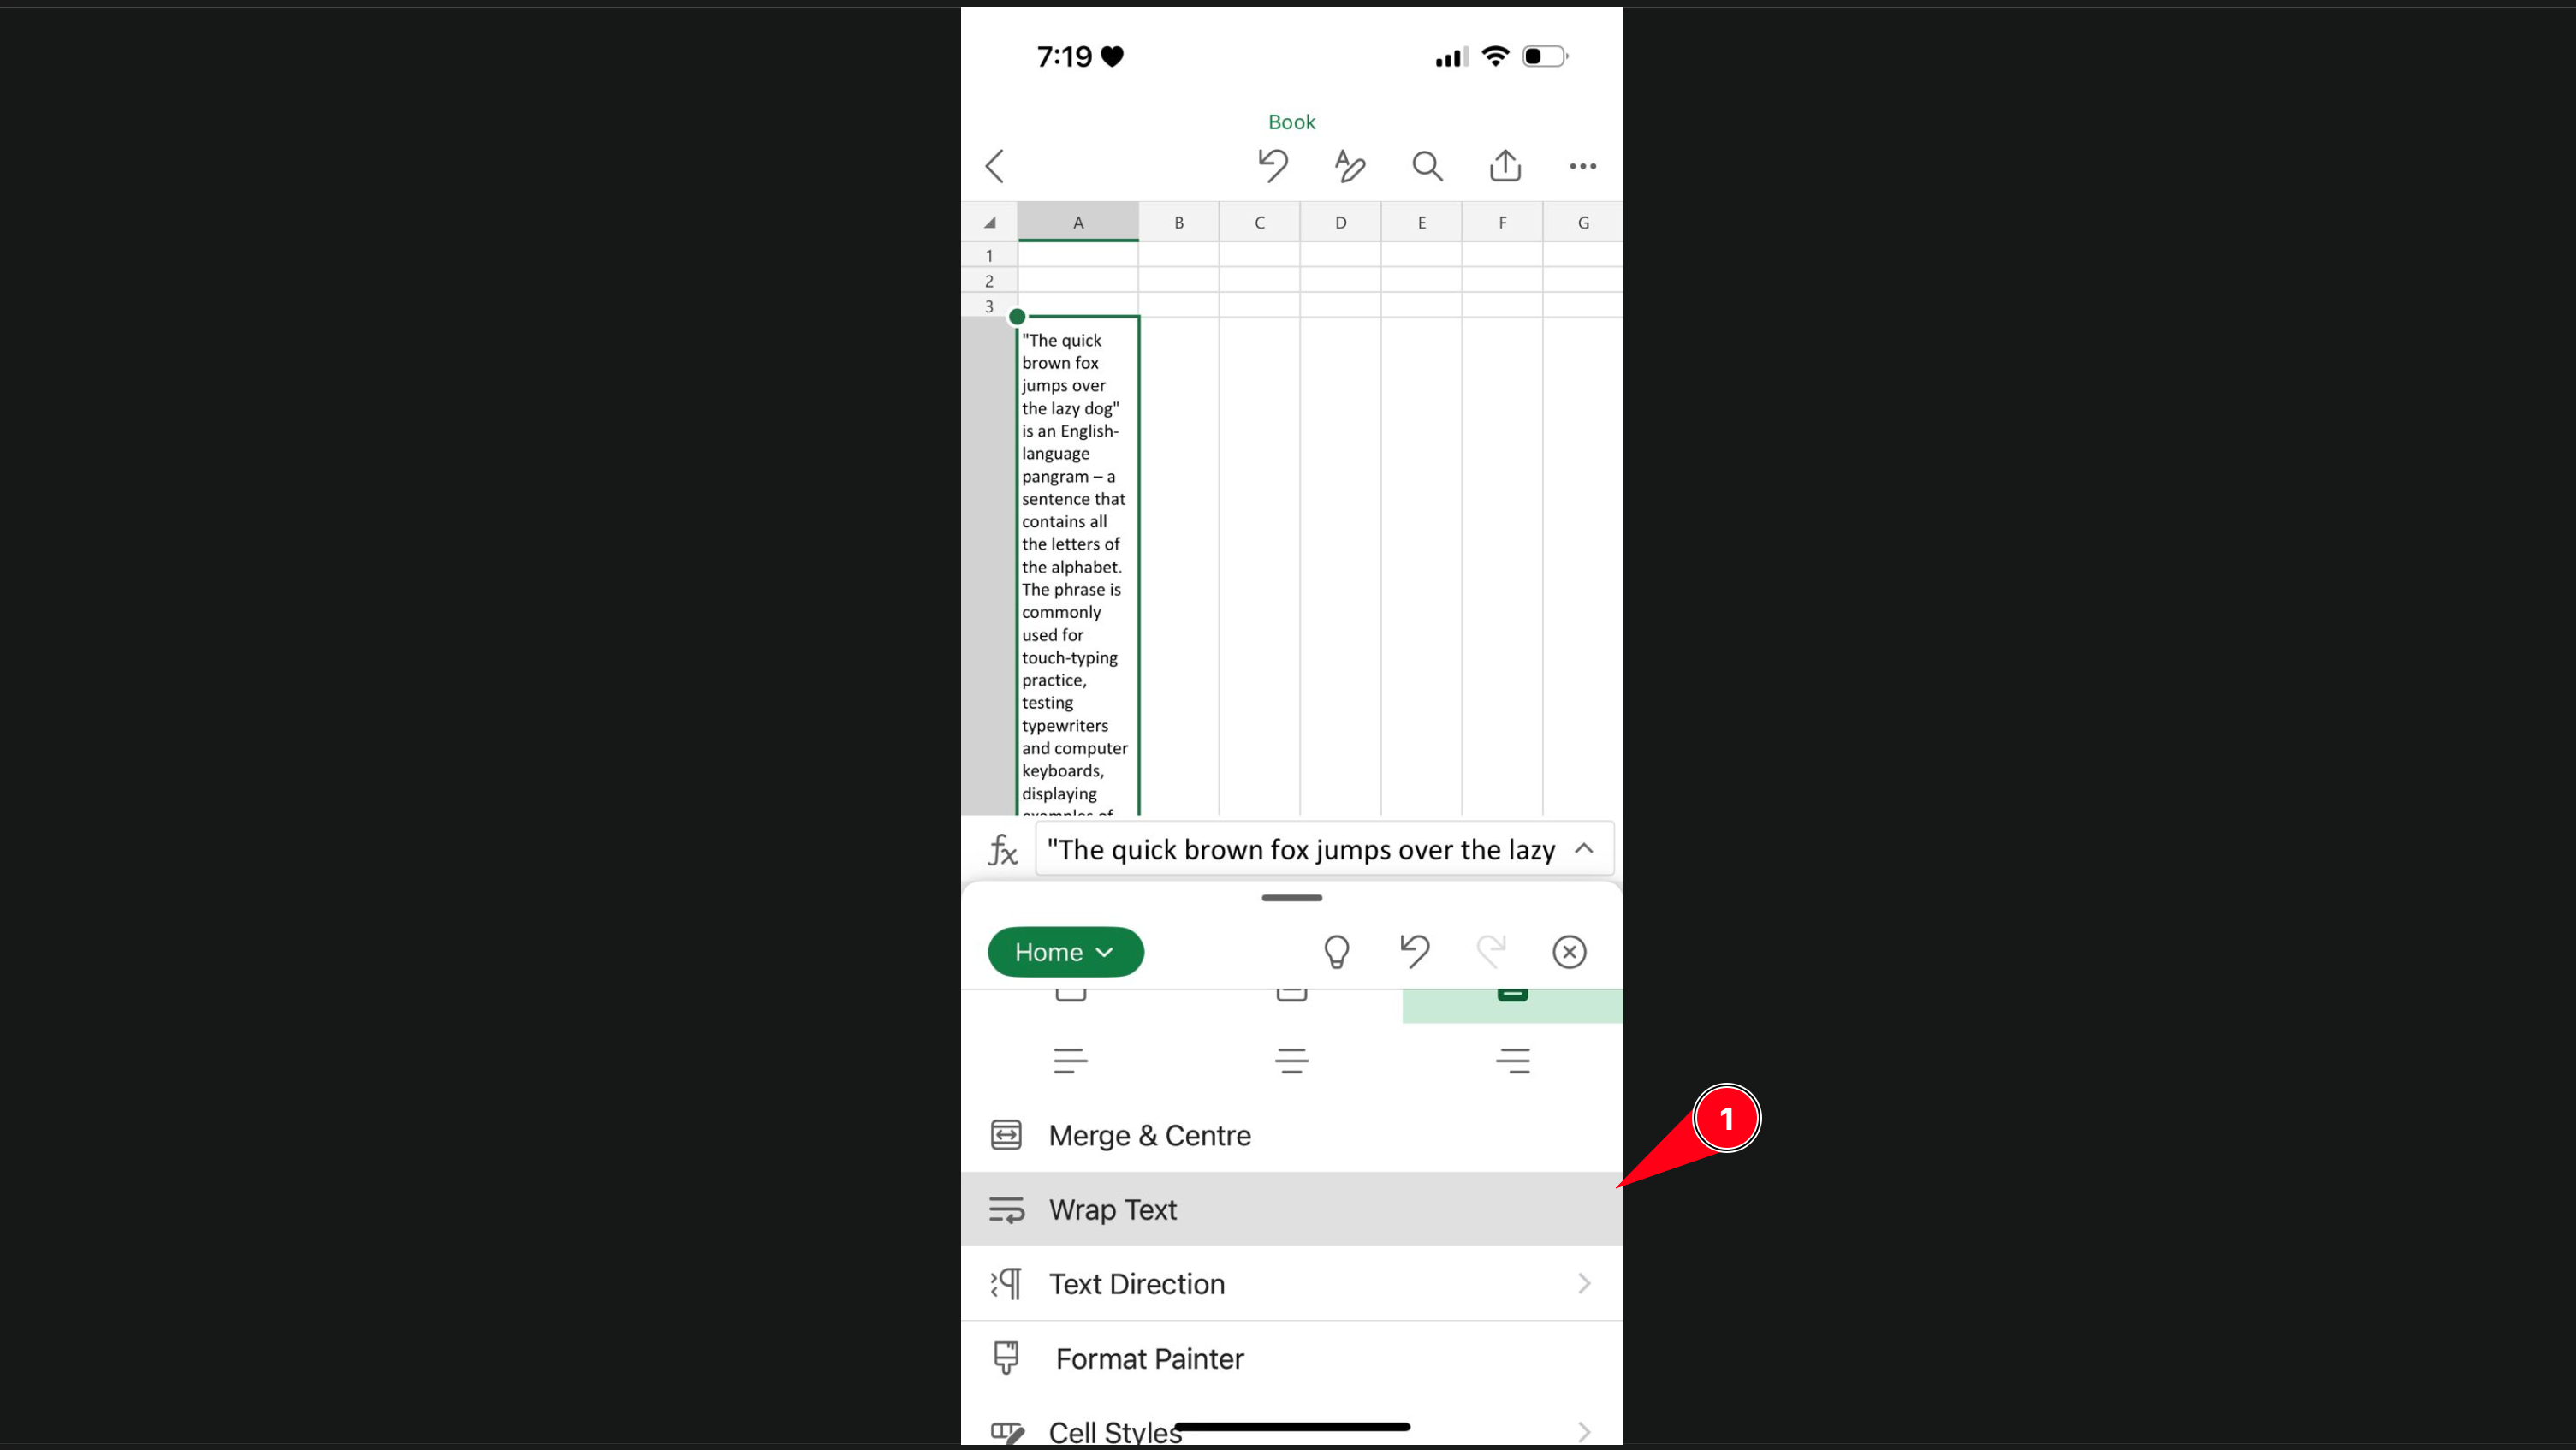
- Highlight the desired cell(s).
- Go to the Home tab.
- Click Wrap Text in the Alignment section.
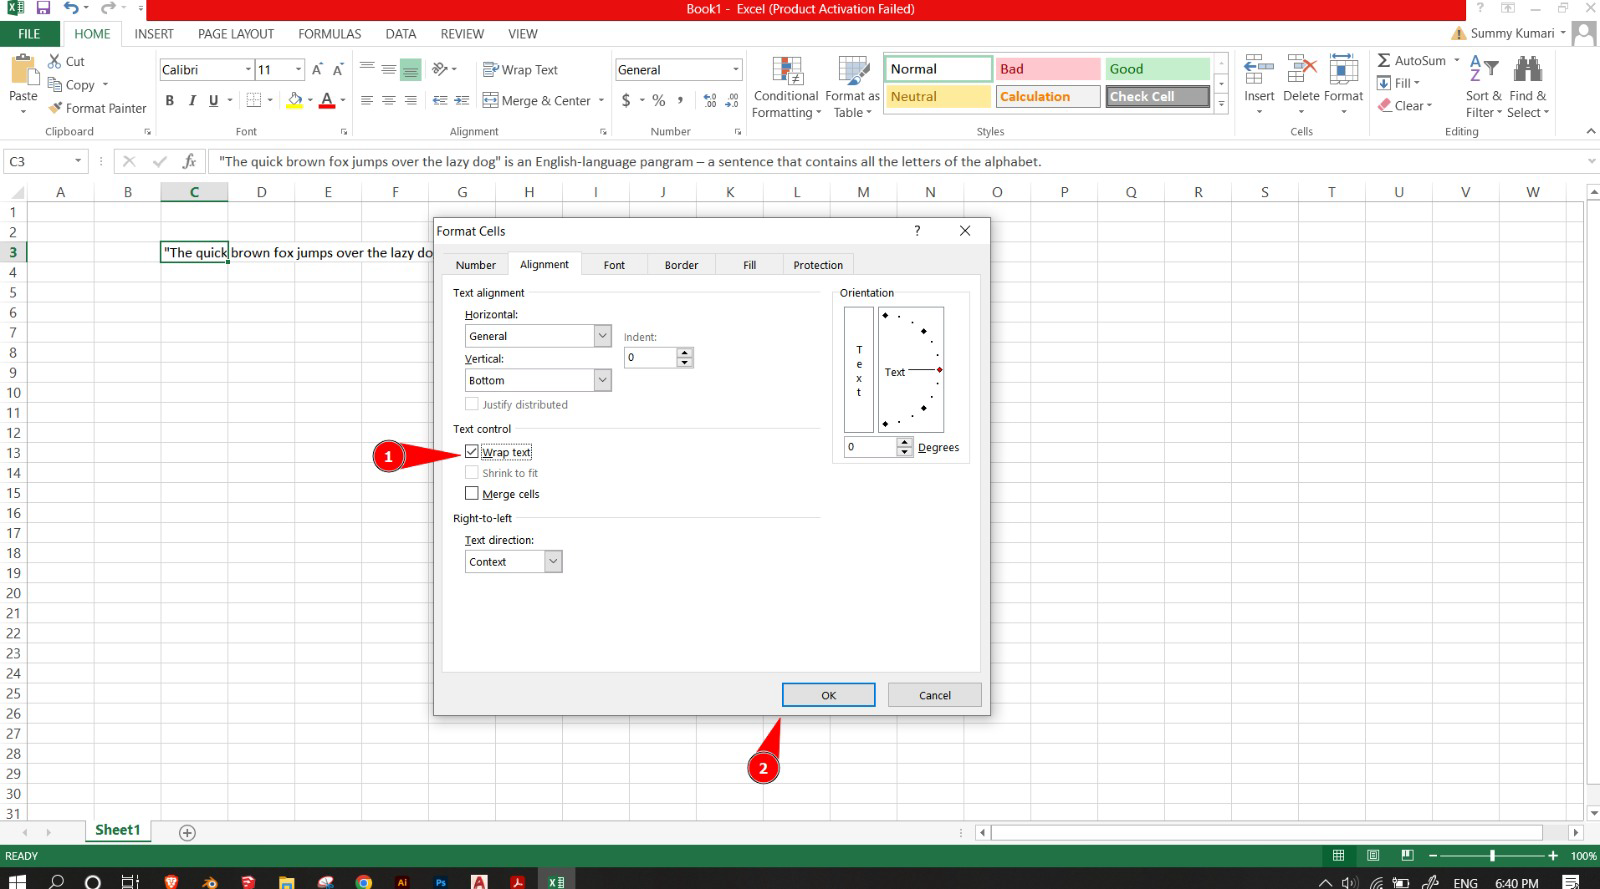
- Select the cell(s).
- Right-click and choose Format Cells, or press
Command + 1. - Under the Alignment tab, check Wrap text.
- Click OK.
- Double-click the cell to edit.
- Place the cursor where you want the text to break.
- Press
Control + Option + Returnto insert a line break.
- Open the Excel app and select a cell.
- Tap the Format button (paintbrush icon).
- In the Cell tab, toggle on Wrap Text.
- After enabling wrap text, adjust the row height:
- Long-press the row number.
- Drag to increase the row height for better visibility.
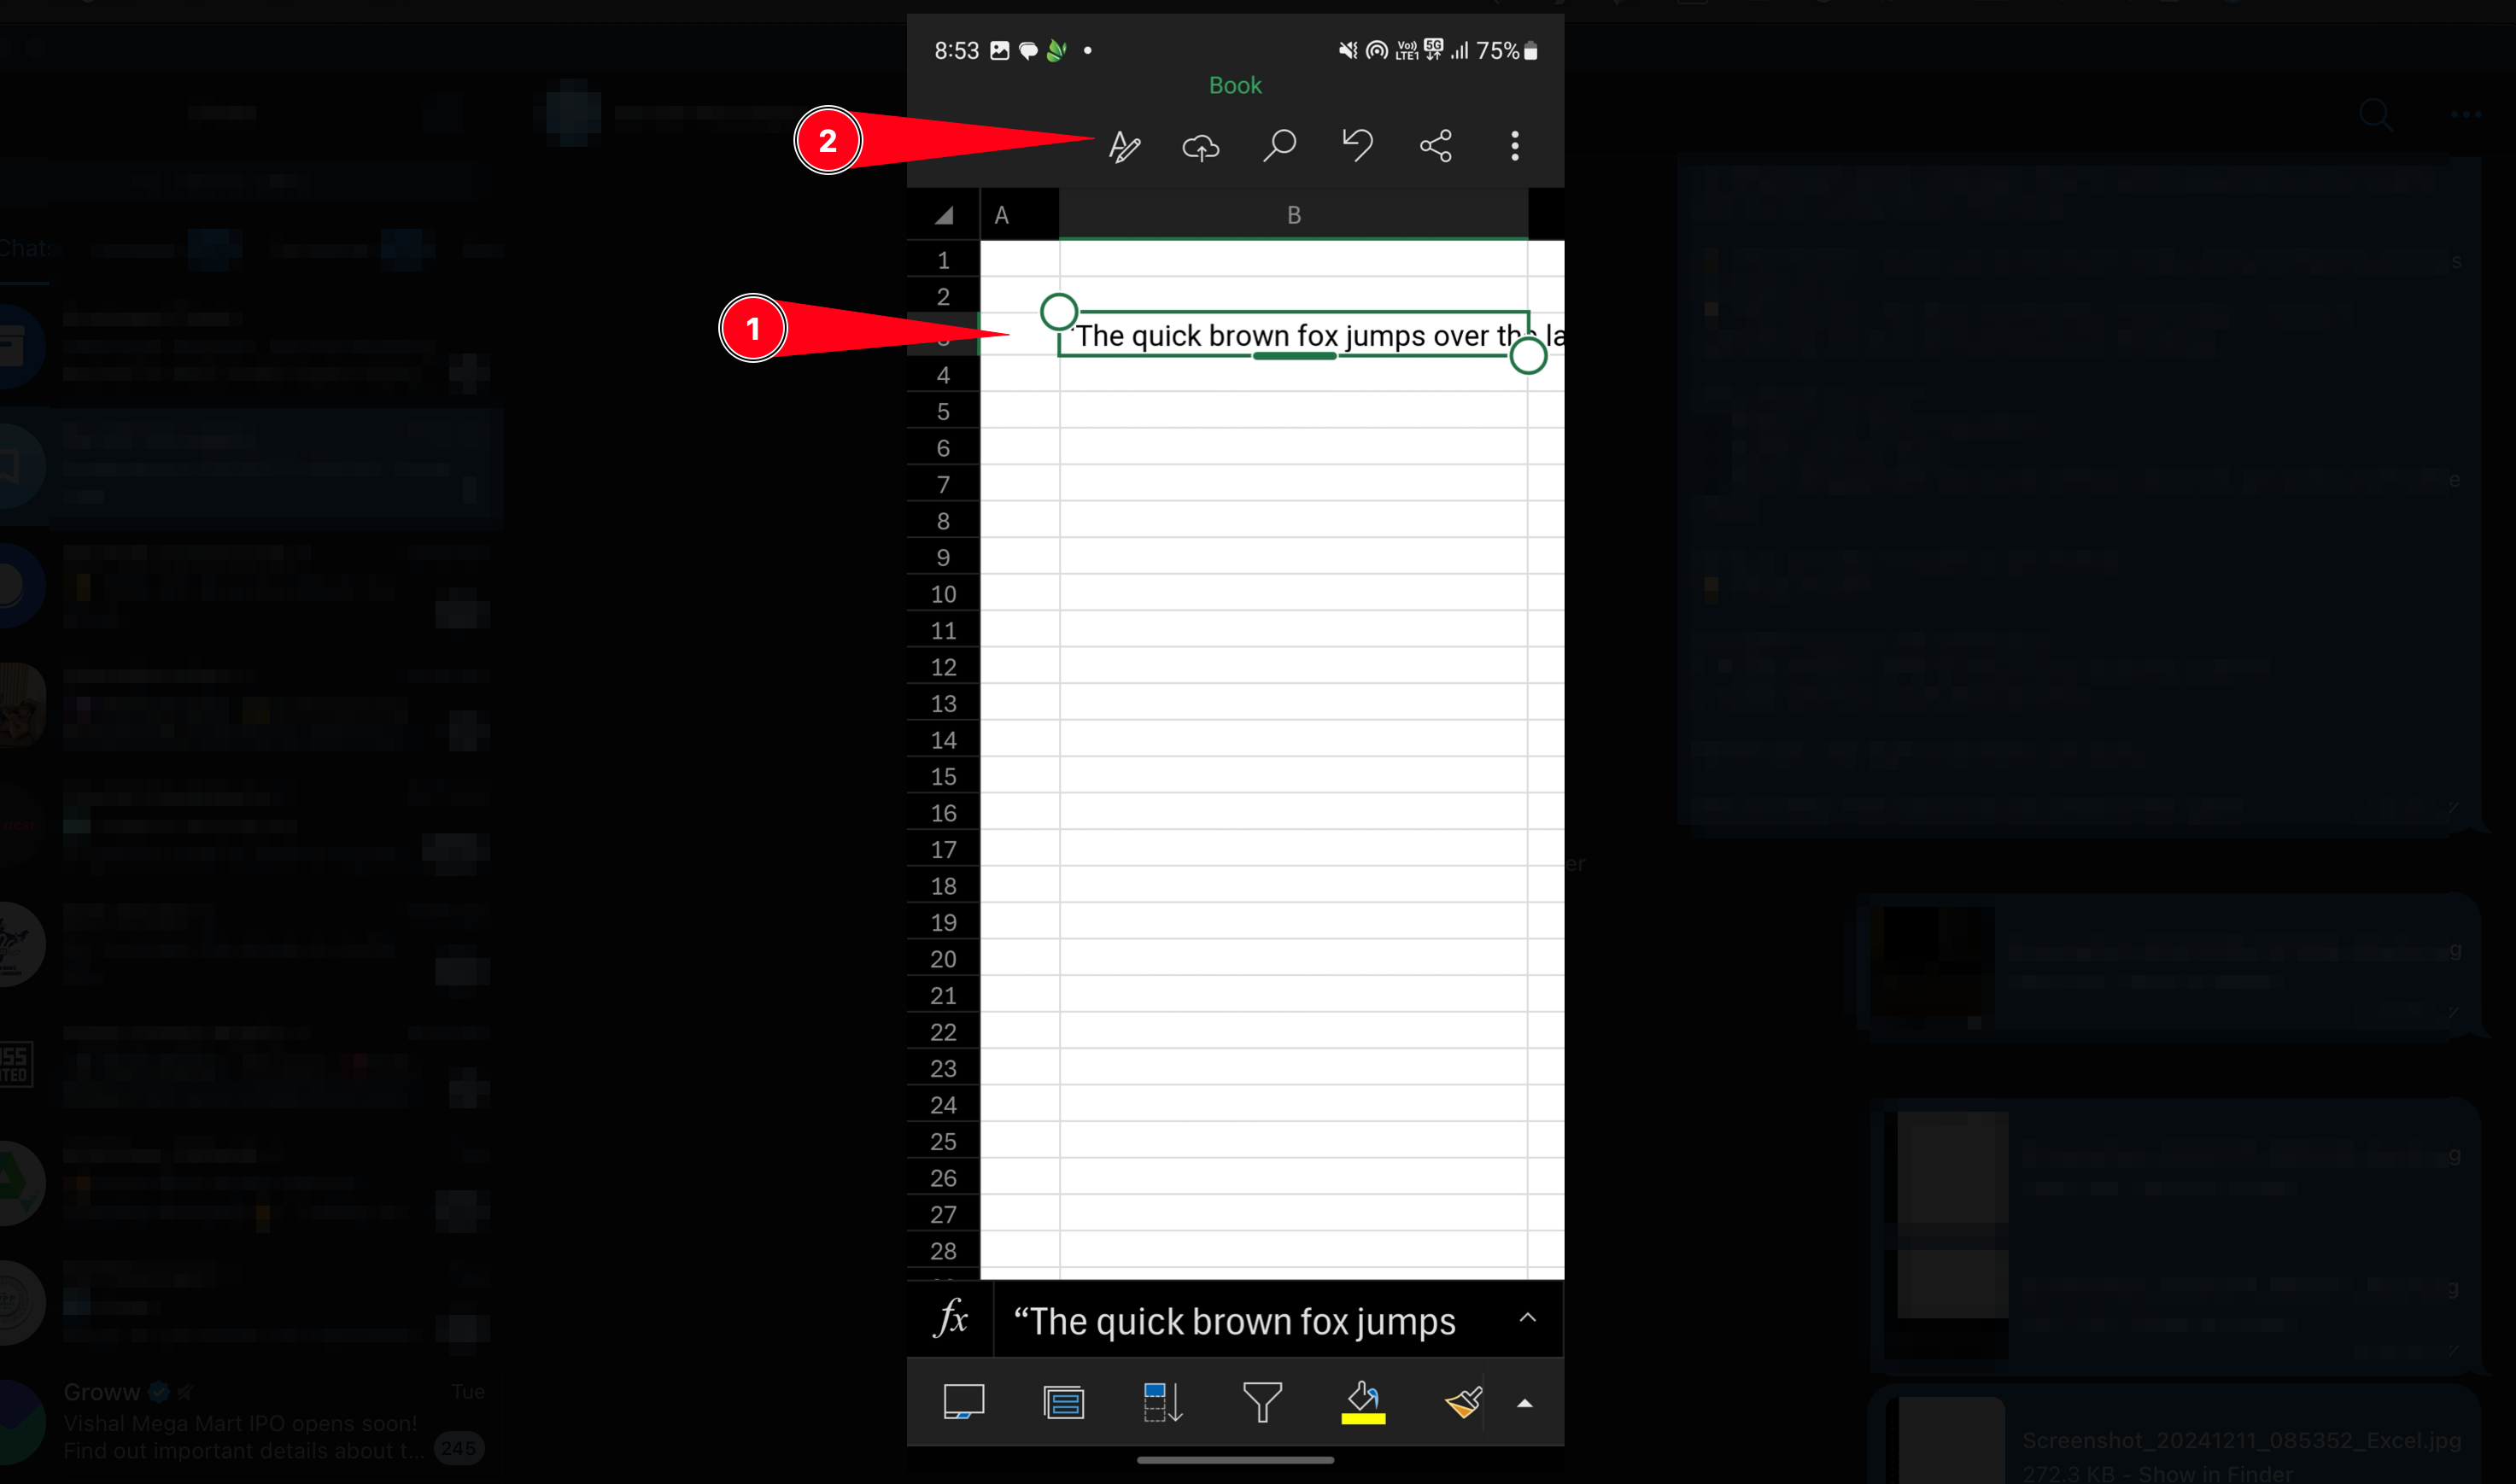
- Open the Excel app and select a cell.
- Tap the Format option (three dots or formatting icon).
- Go to Alignment and select Wrap Text.
- To ensure all text is visible:
- Long-press the row number.
- Drag to adjust the row height.
- Avoid Merging Cells: Wrapping text doesn’t always work well with merged cells.
- Use AutoFit: This ensures rows resize automatically to fit the text and make the spreadsheet more legible.
- Optimize for Mobile Devices: Shorten text where possible for better readability on iOS and Android.
By following these steps, you can easily wrap text in Excel across Windows, Mac, iOS, and Android, ensuring your data is well-organized and easy to read. Whether you're using a keyboard shortcut or the mobile app, wrapping text make the spreadsheet more readable and improves your productivity.
Have more questions, feel free to ask one using the chat widget on the bottom!