How to Freeze a Row in Excel: A Comprehensive Guide
Freezing rows in Excel ensures certain data remains visible while scrolling through large datasets. This feature is invaluable for keeping headers or specific rows within view. In this guide, we'll cover everything you need to know about freezing rows, columns, and even combinations of both, on different versions of Excel including Windows, Mac, and Excel Online.
As freezing a row is a relatively simple task, the steps are the same for Windows and Mac. It is slightly different on Excel Online, so we have added separate screenshots for that too :)
If you're looking to freeze rows or columns in Google Sheets instead, follow the guide here.
Freezing the top row in Excel is the most common use case, especially for datasets with headers.
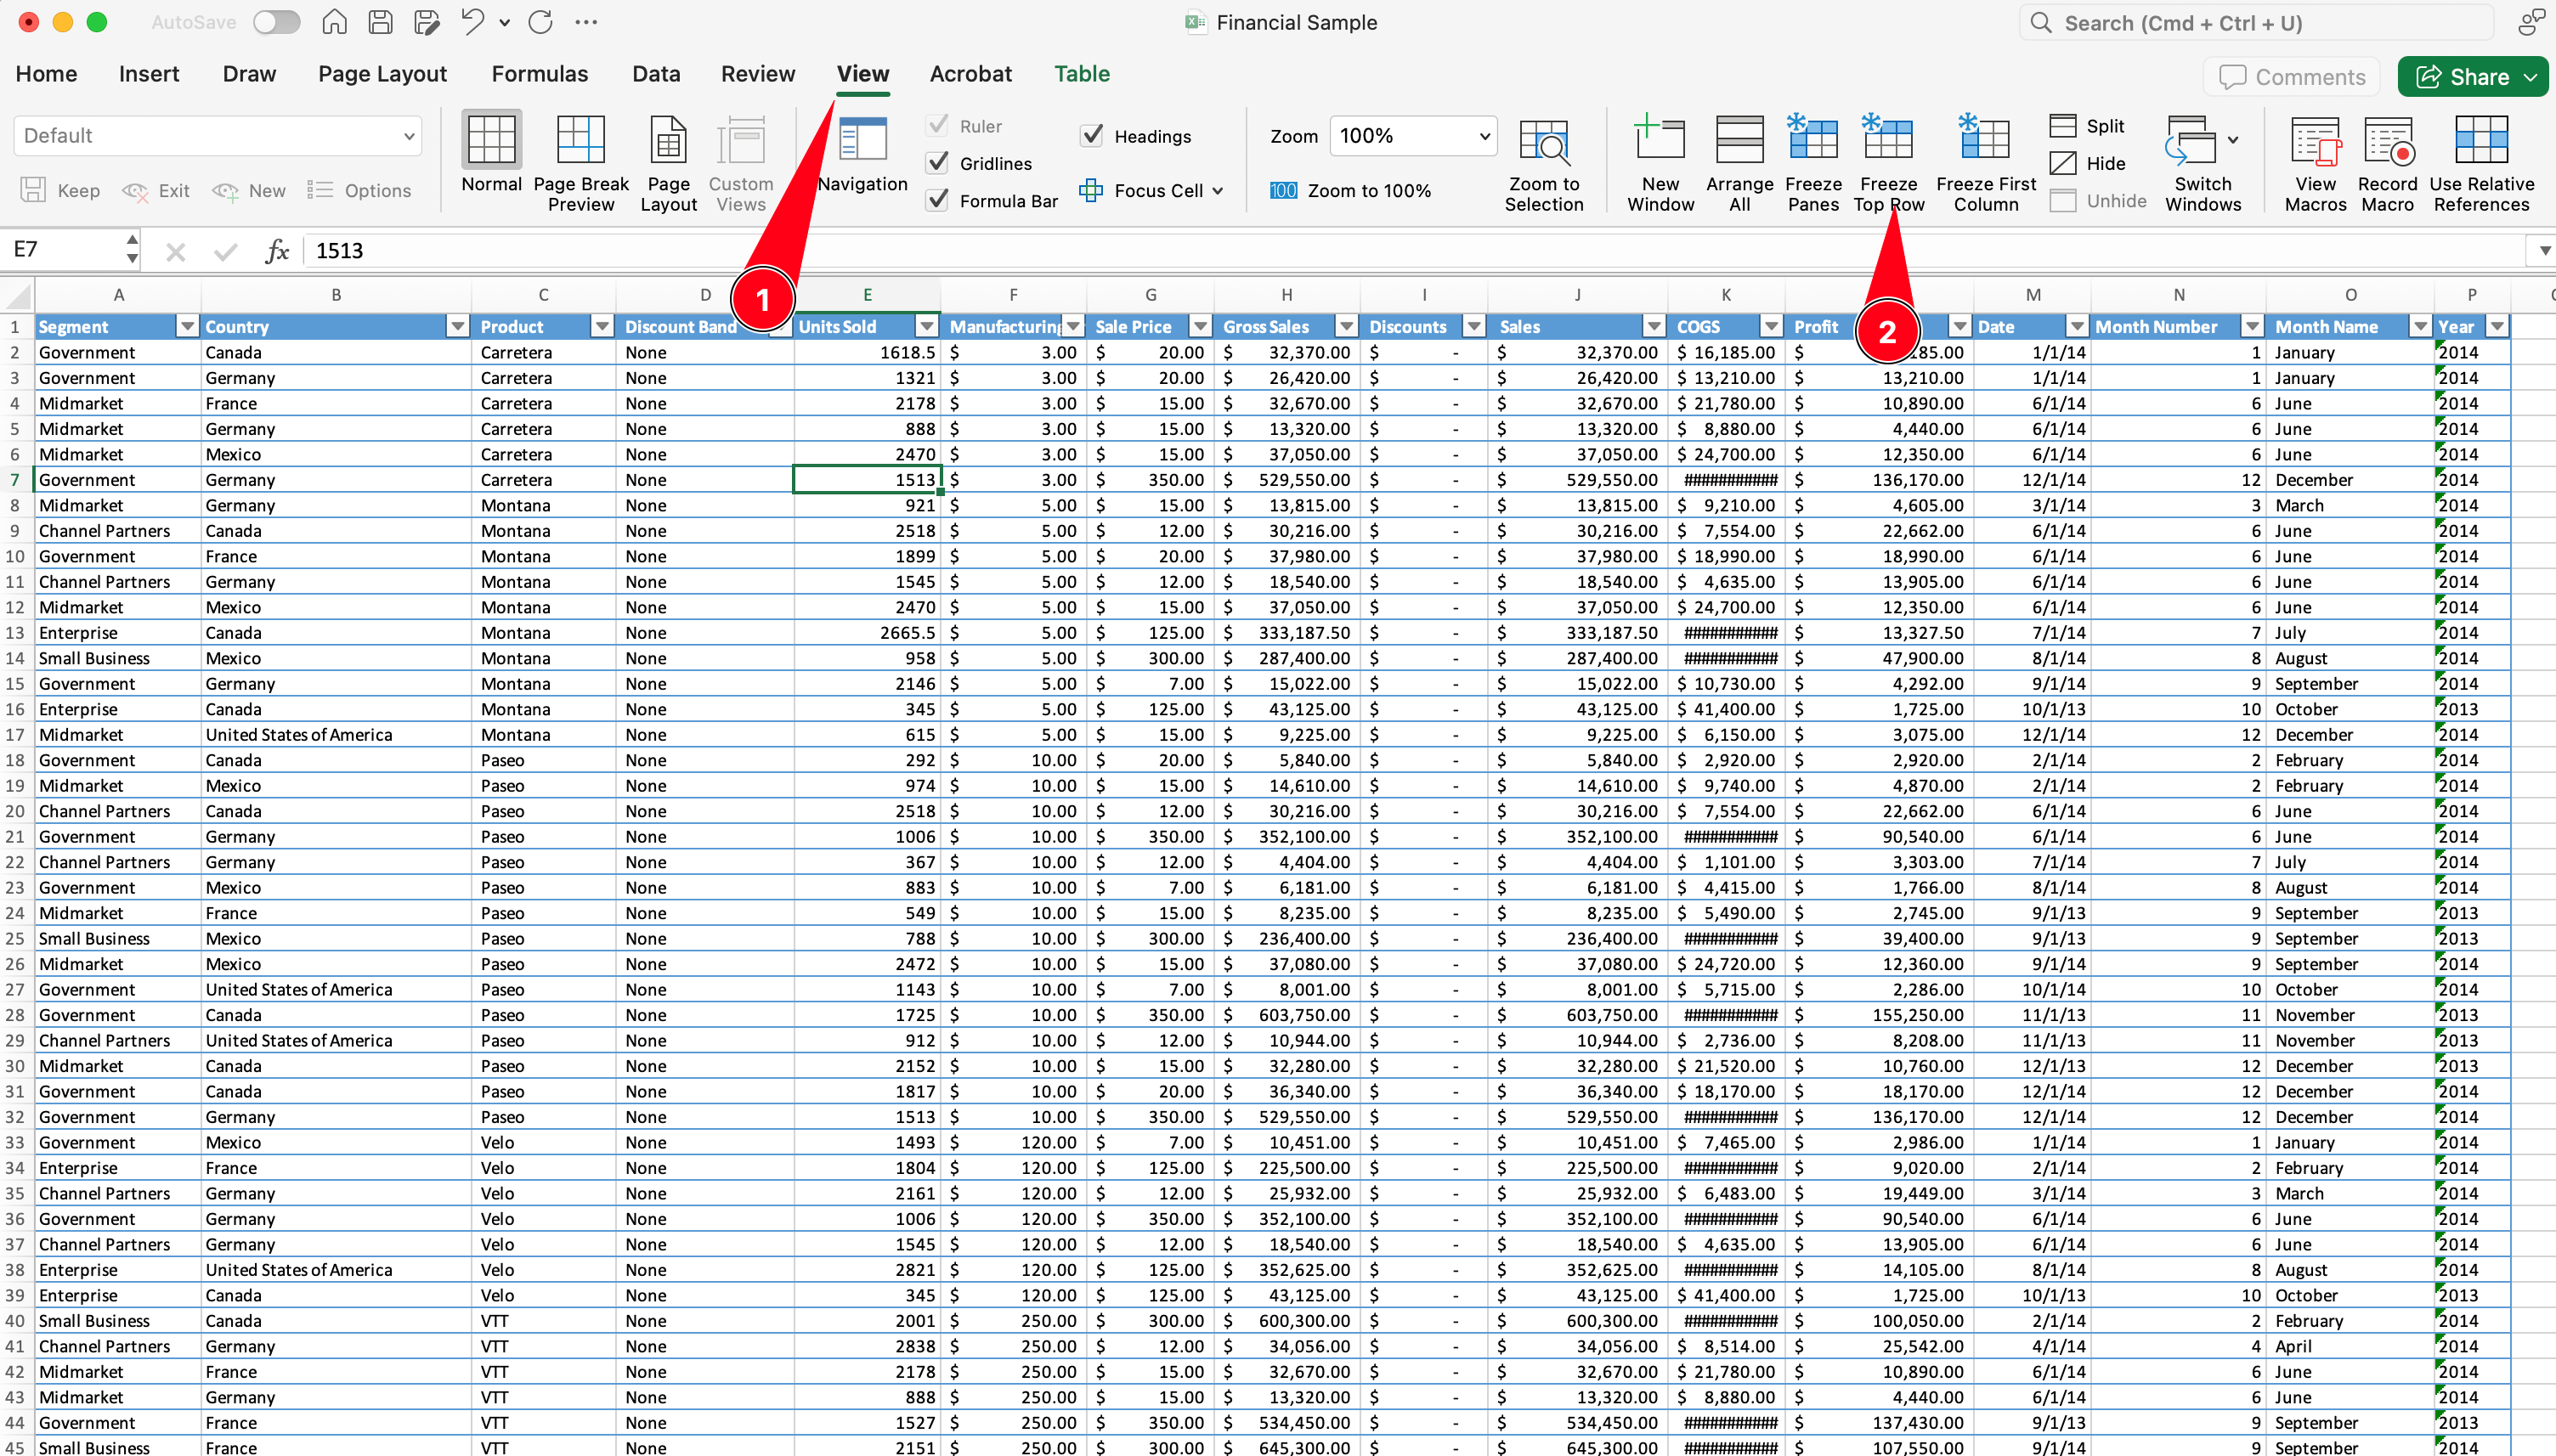
- Open Your Spreadsheet: Start by opening the Excel workbook you want to modify.
- Navigate to the Ribbon: Go to the View tab on the ribbon.
- Freeze Top Row: Click Freeze Panes and select Freeze Top Row from the dropdown.
Now, the top row will remain visible no matter how far you scroll. This will freeze the row and ensure it always remains visible.
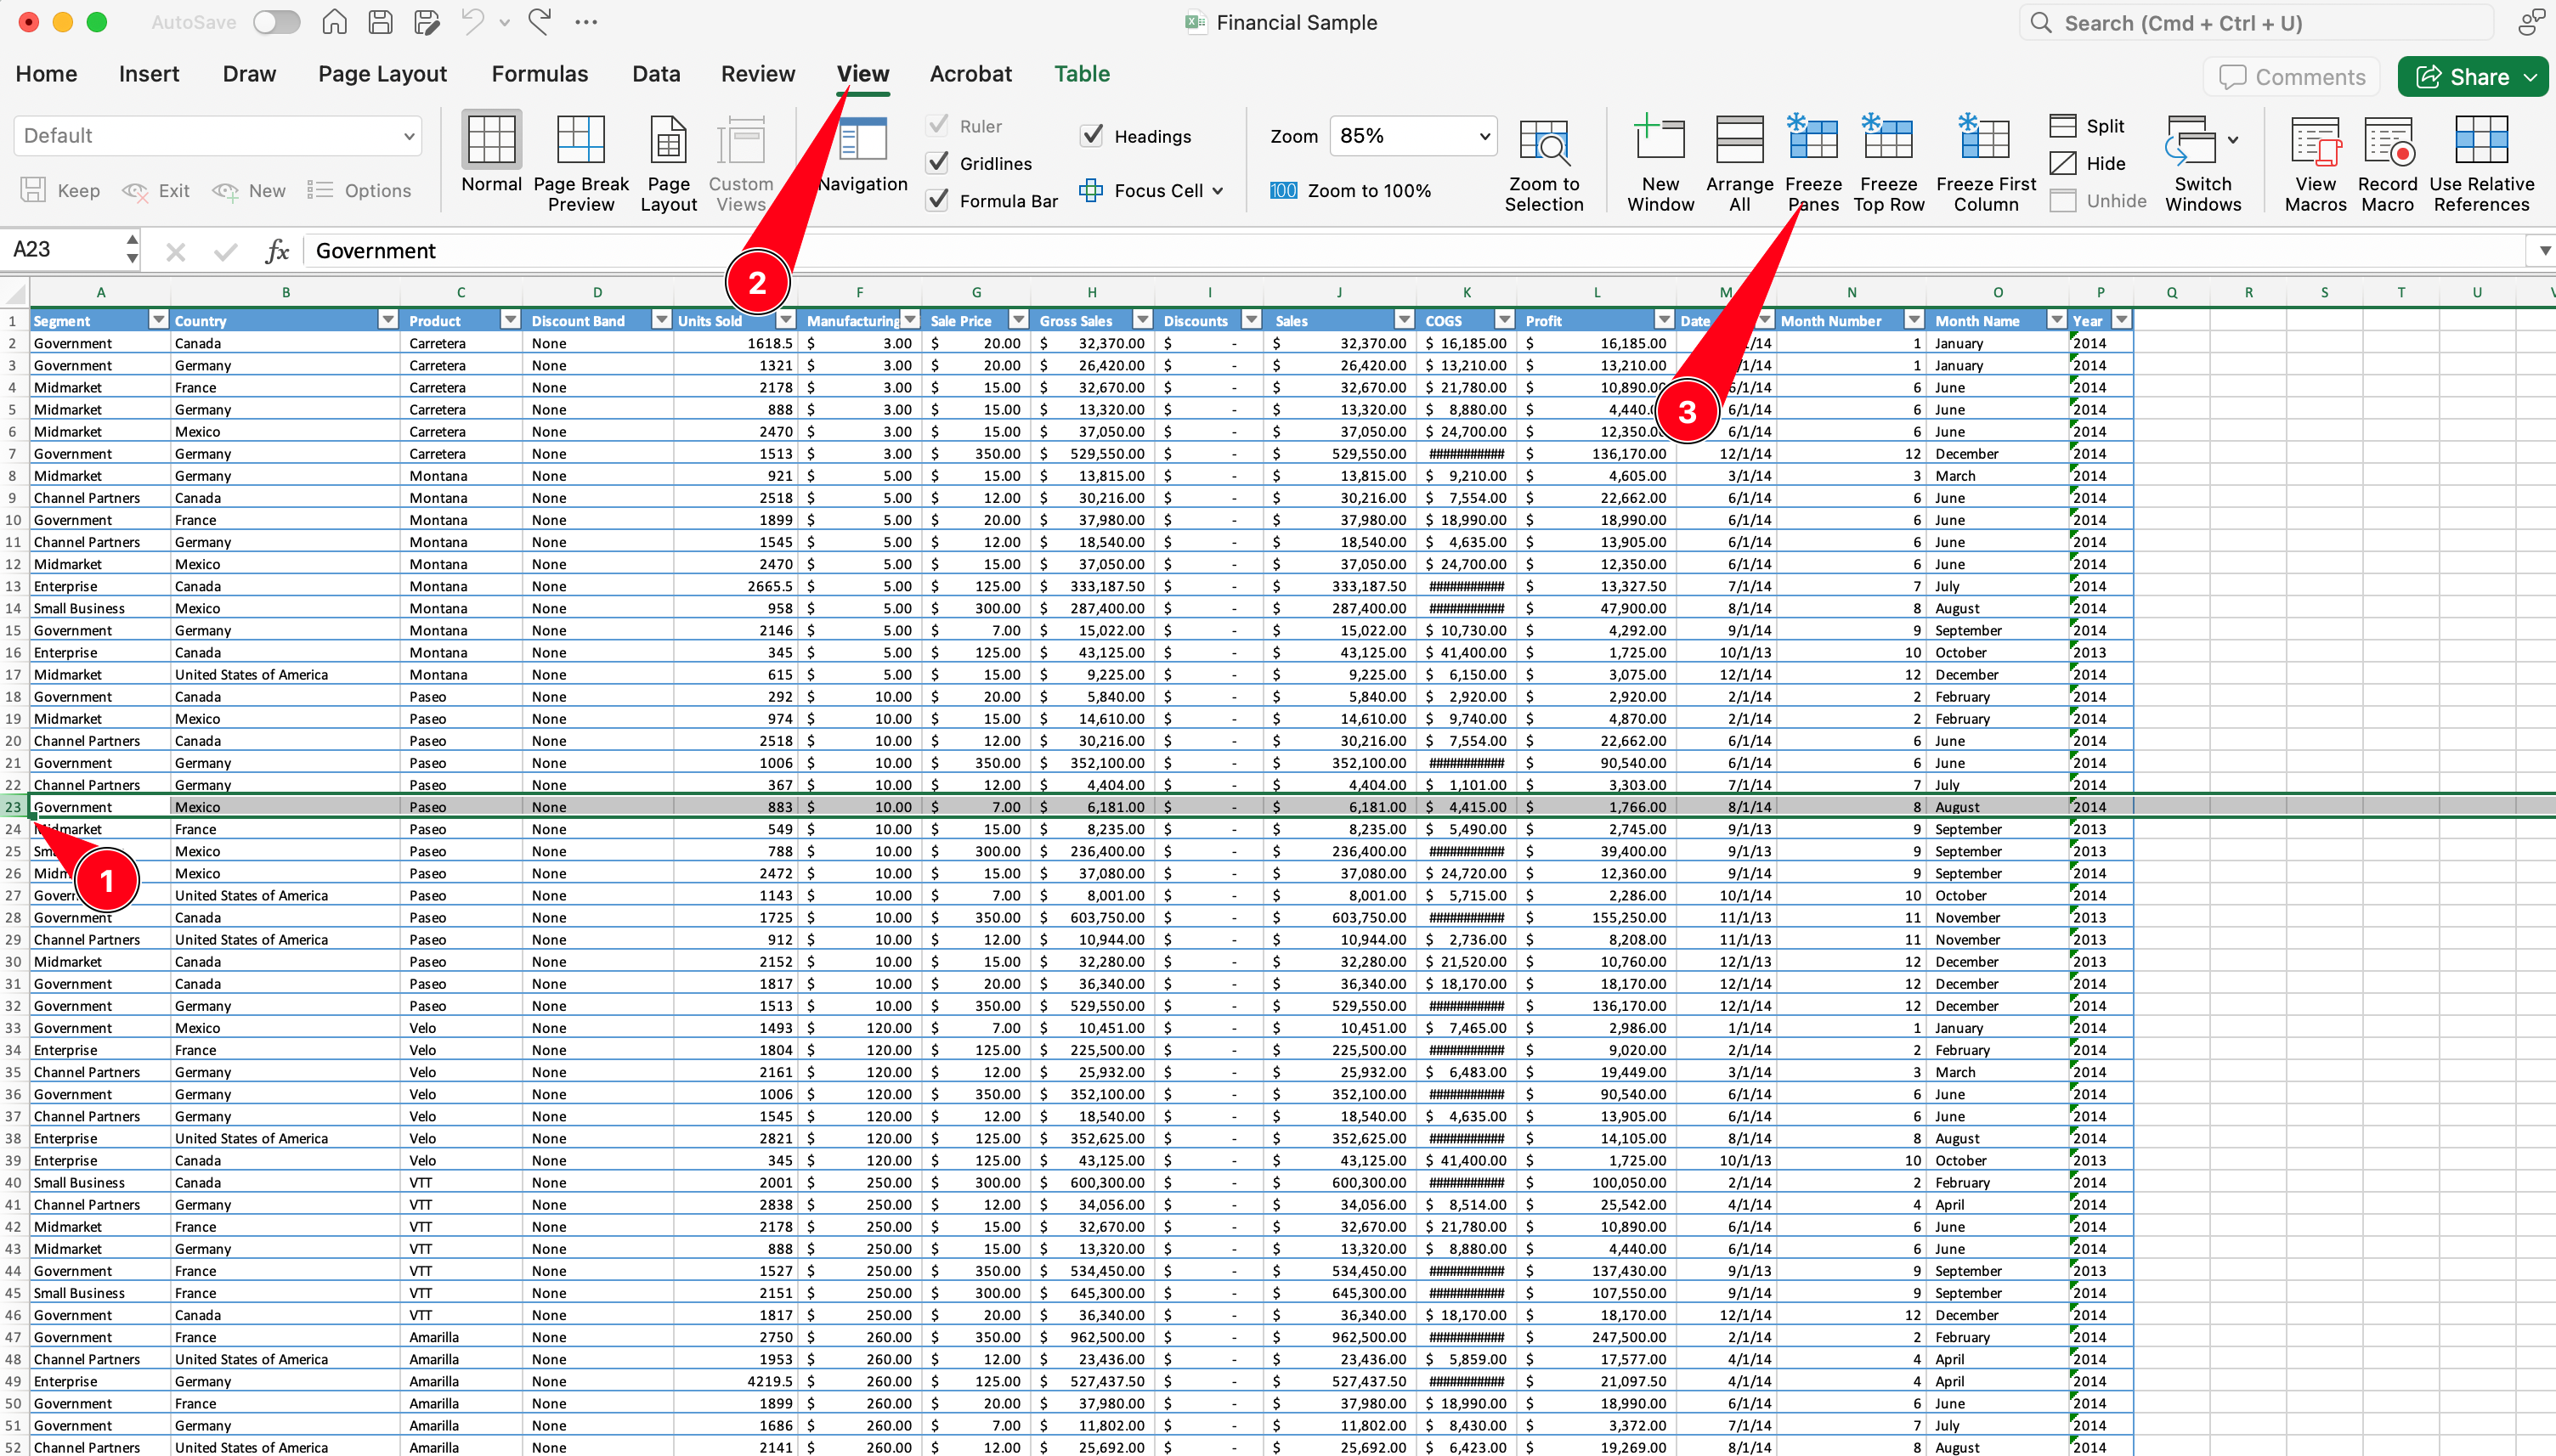
Freezing a specific row allows you to lock any row that is not the topmost one.
- Select the Row Below: Click on the row number just below the row you want to freeze. For example, to freeze row 2, select row 3.
- Go to Freeze Panes: Under the View tab, select Freeze Panes > Freeze Panes again.
This will freeze the selected row, keeping it in place while scrolling.
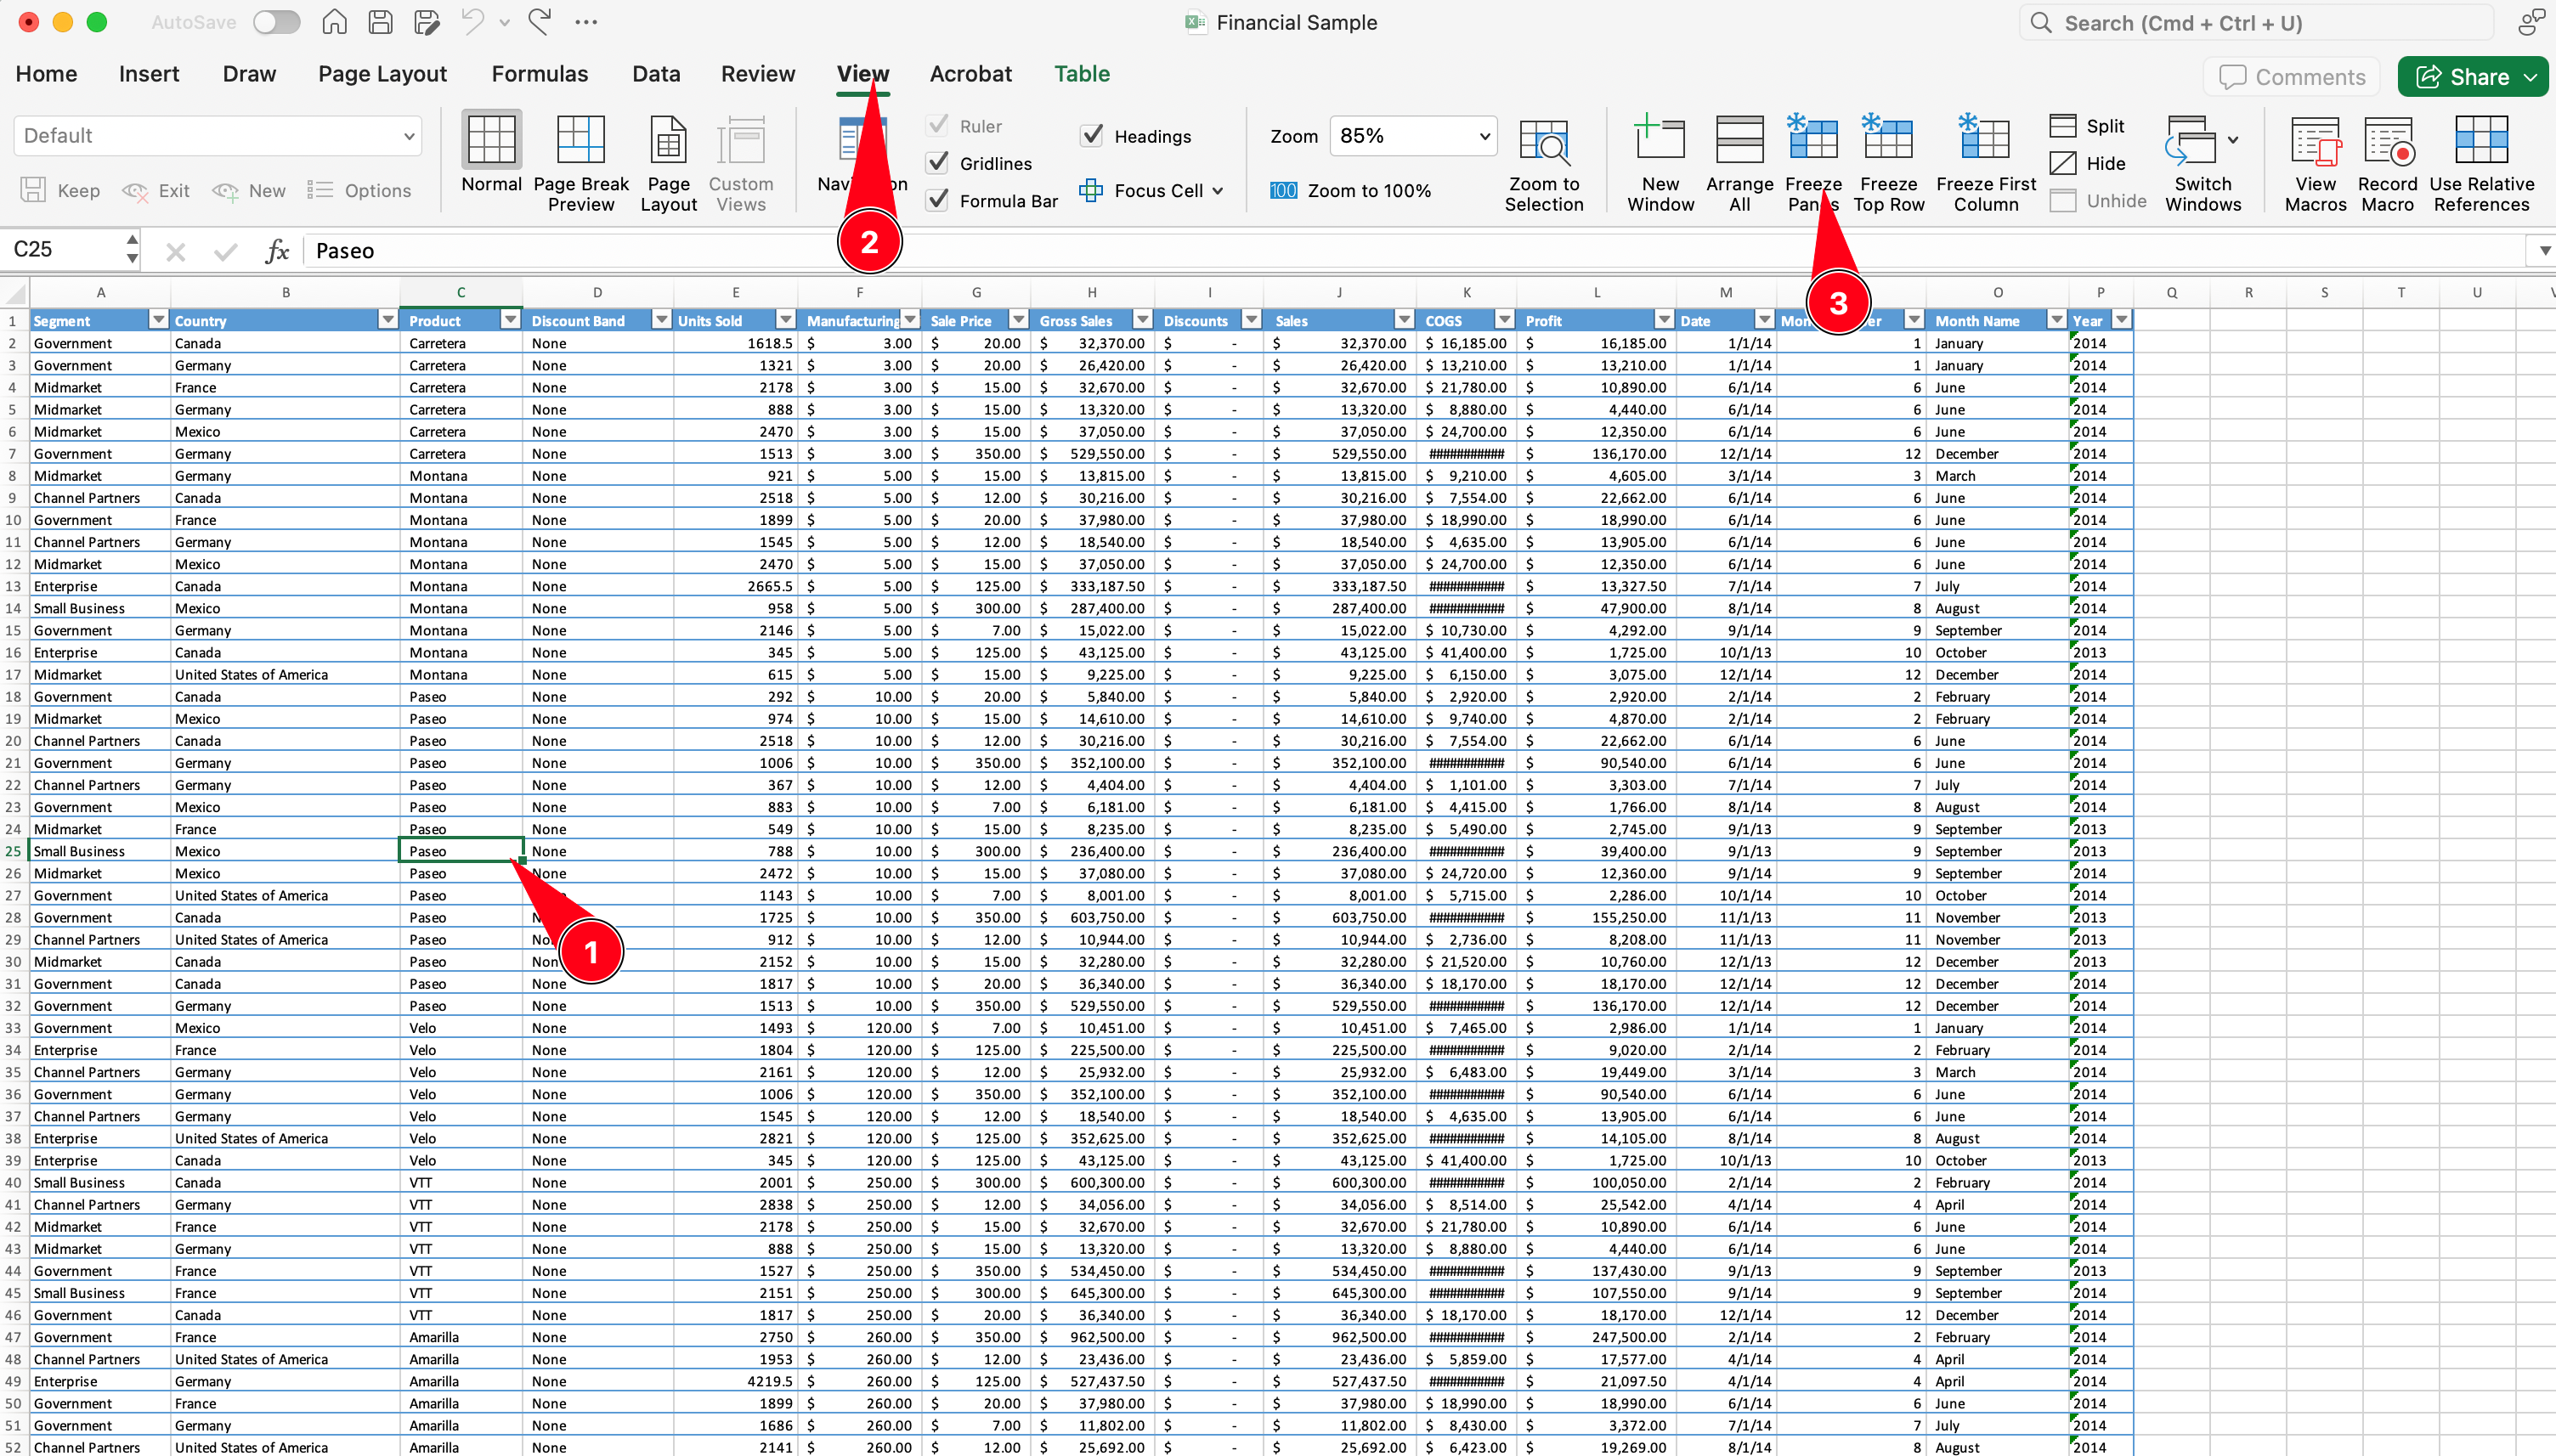
Freezing both rows and columns at the same time is useful for locking headers or reference columns in place.
- Position the Cursor: Click on the cell just below the row and to the right of the column you want to freeze. For example, to freeze row 1 and column A, select cell B2.
- Activate Freeze Panes: Go to the View tab, select Freeze Panes > Freeze Panes.
Both the row and column will stay visible as you scroll.
To freeze a row that isn’t at the top of your worksheet:
- Select the Row Below: Click the row number below the one you want to freeze.
- Access Freeze Panes: In the View tab, choose Freeze Panes > Freeze Panes.
For example, to freeze row 5, click on row 6 before applying the freeze.
Freezing rows in Excel on Mac is similar to the Windows process:
- Select the Row or Column: Highlight the row below the one you wish to freeze.
- Freeze Panes: Navigate to the View menu and choose Freeze Panes.
This works for both individual rows and combinations of rows and columns.

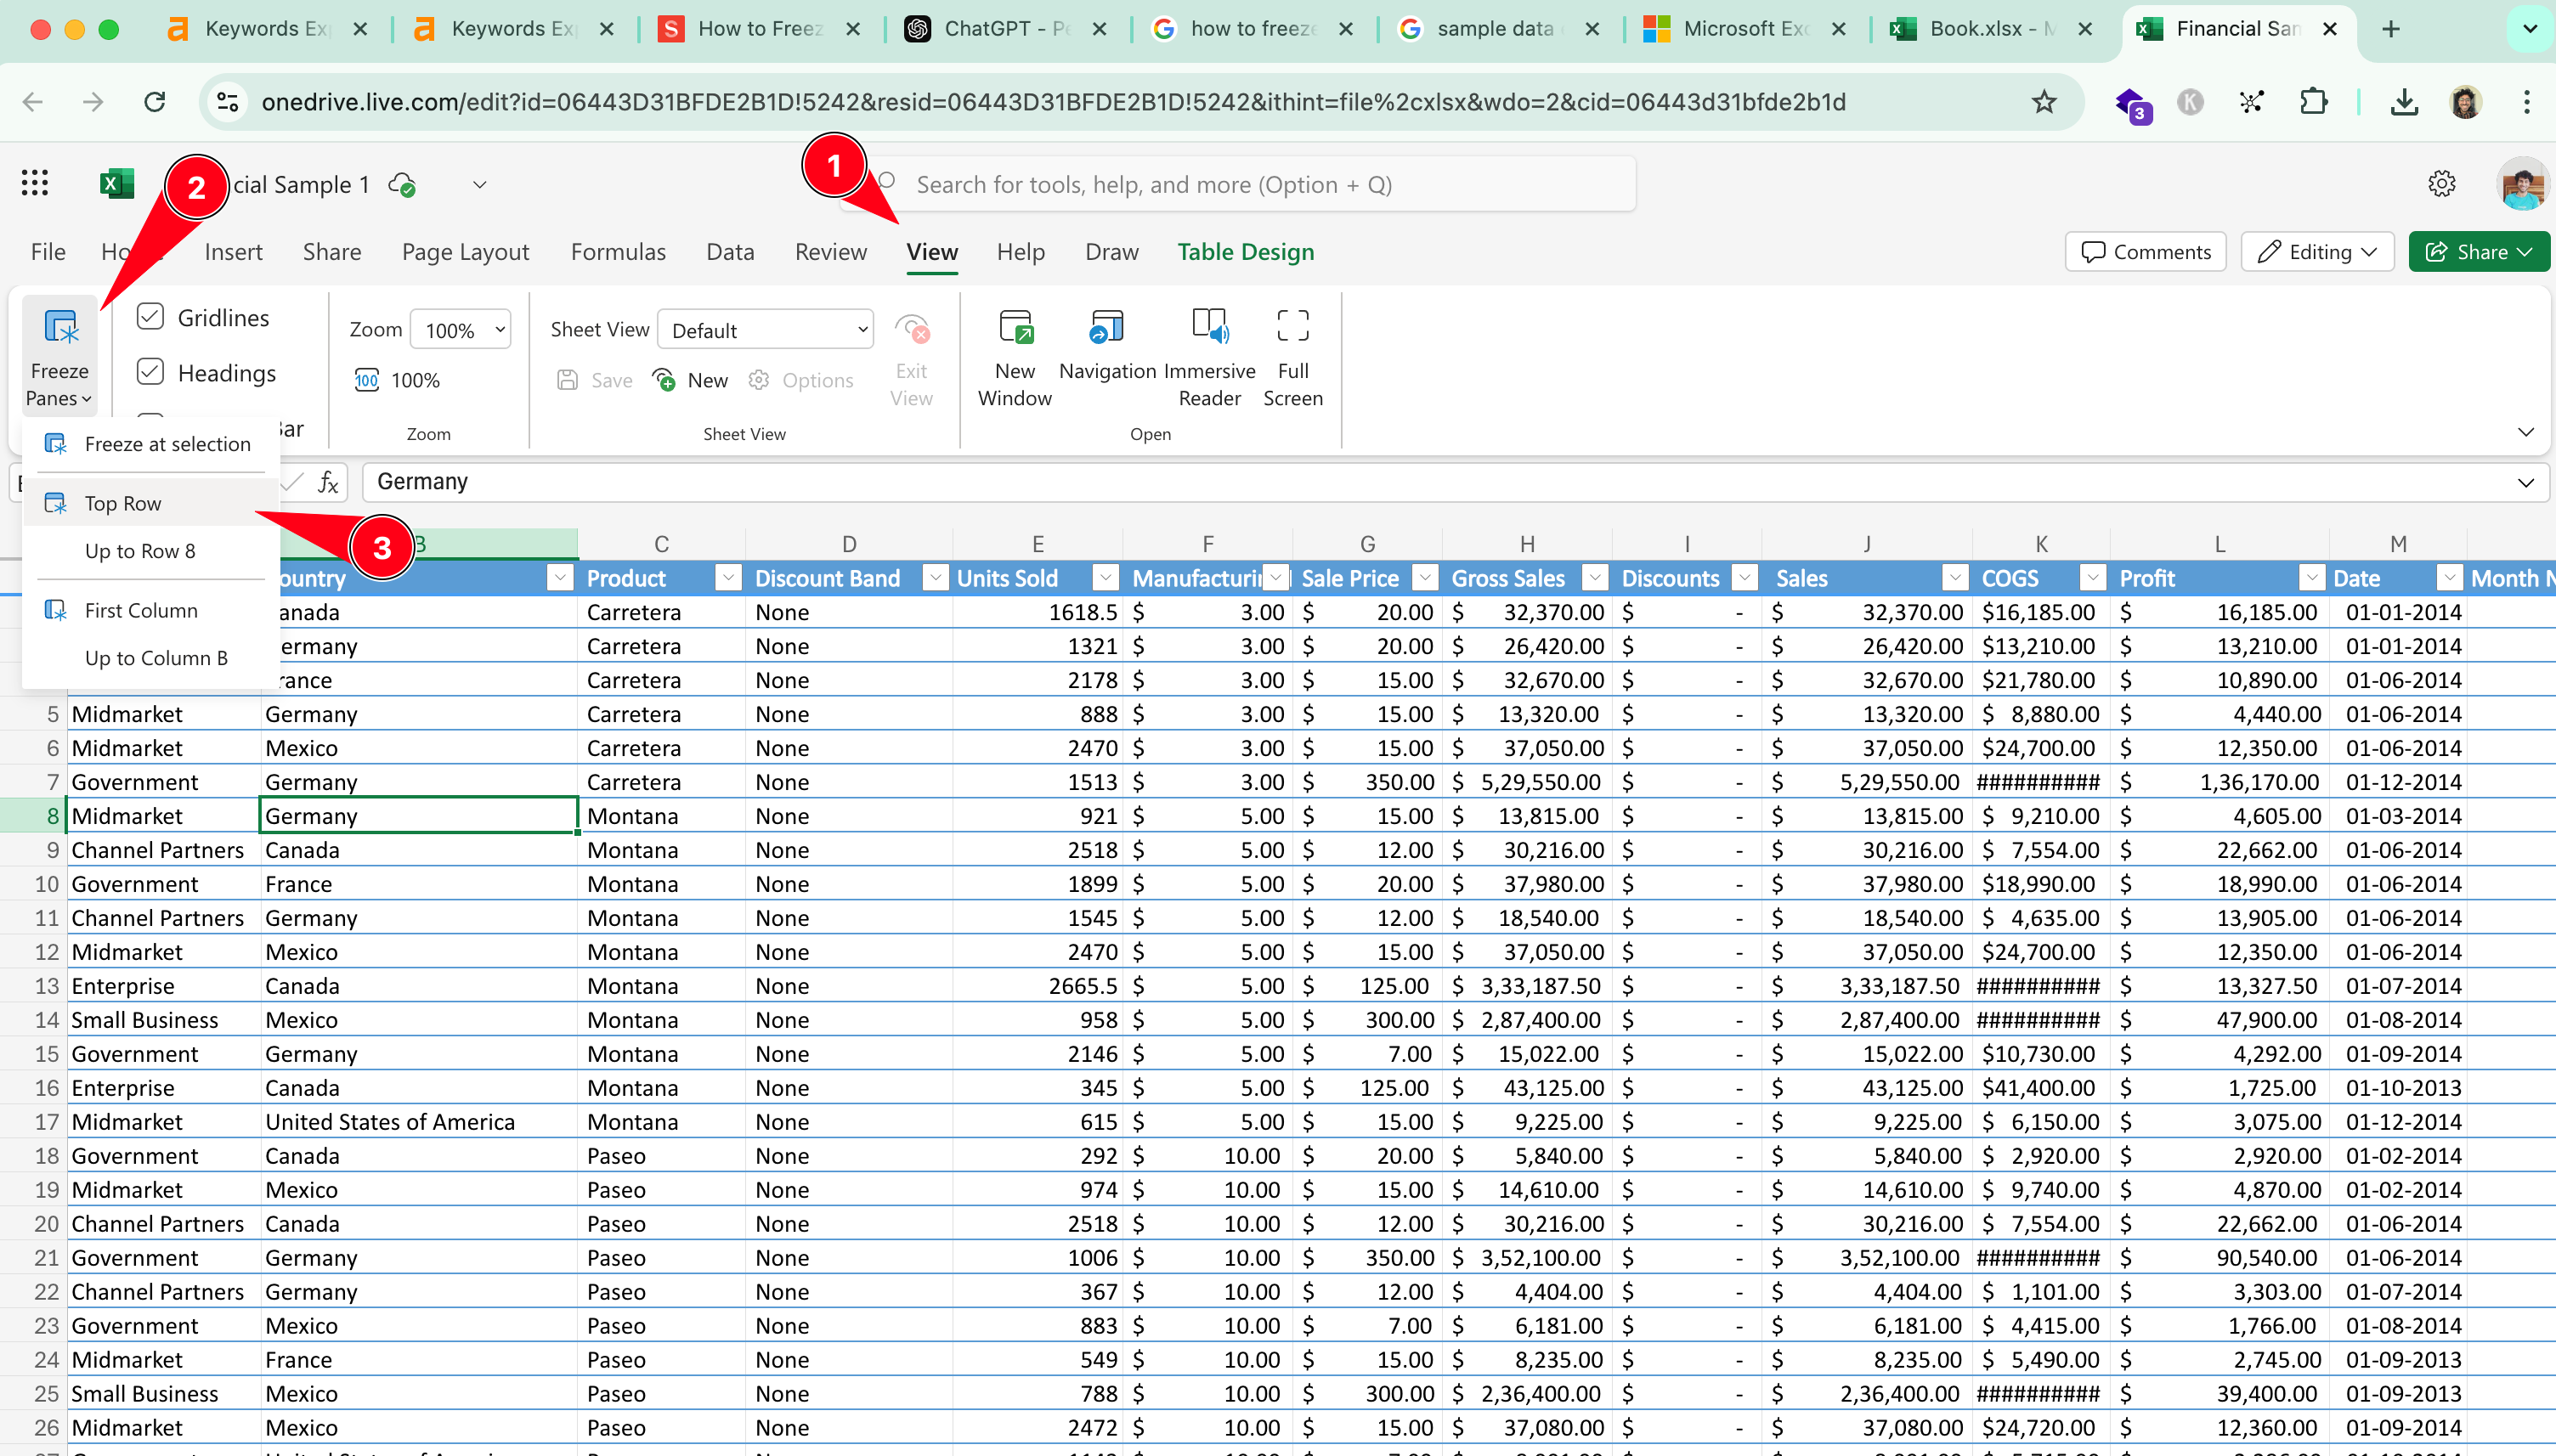
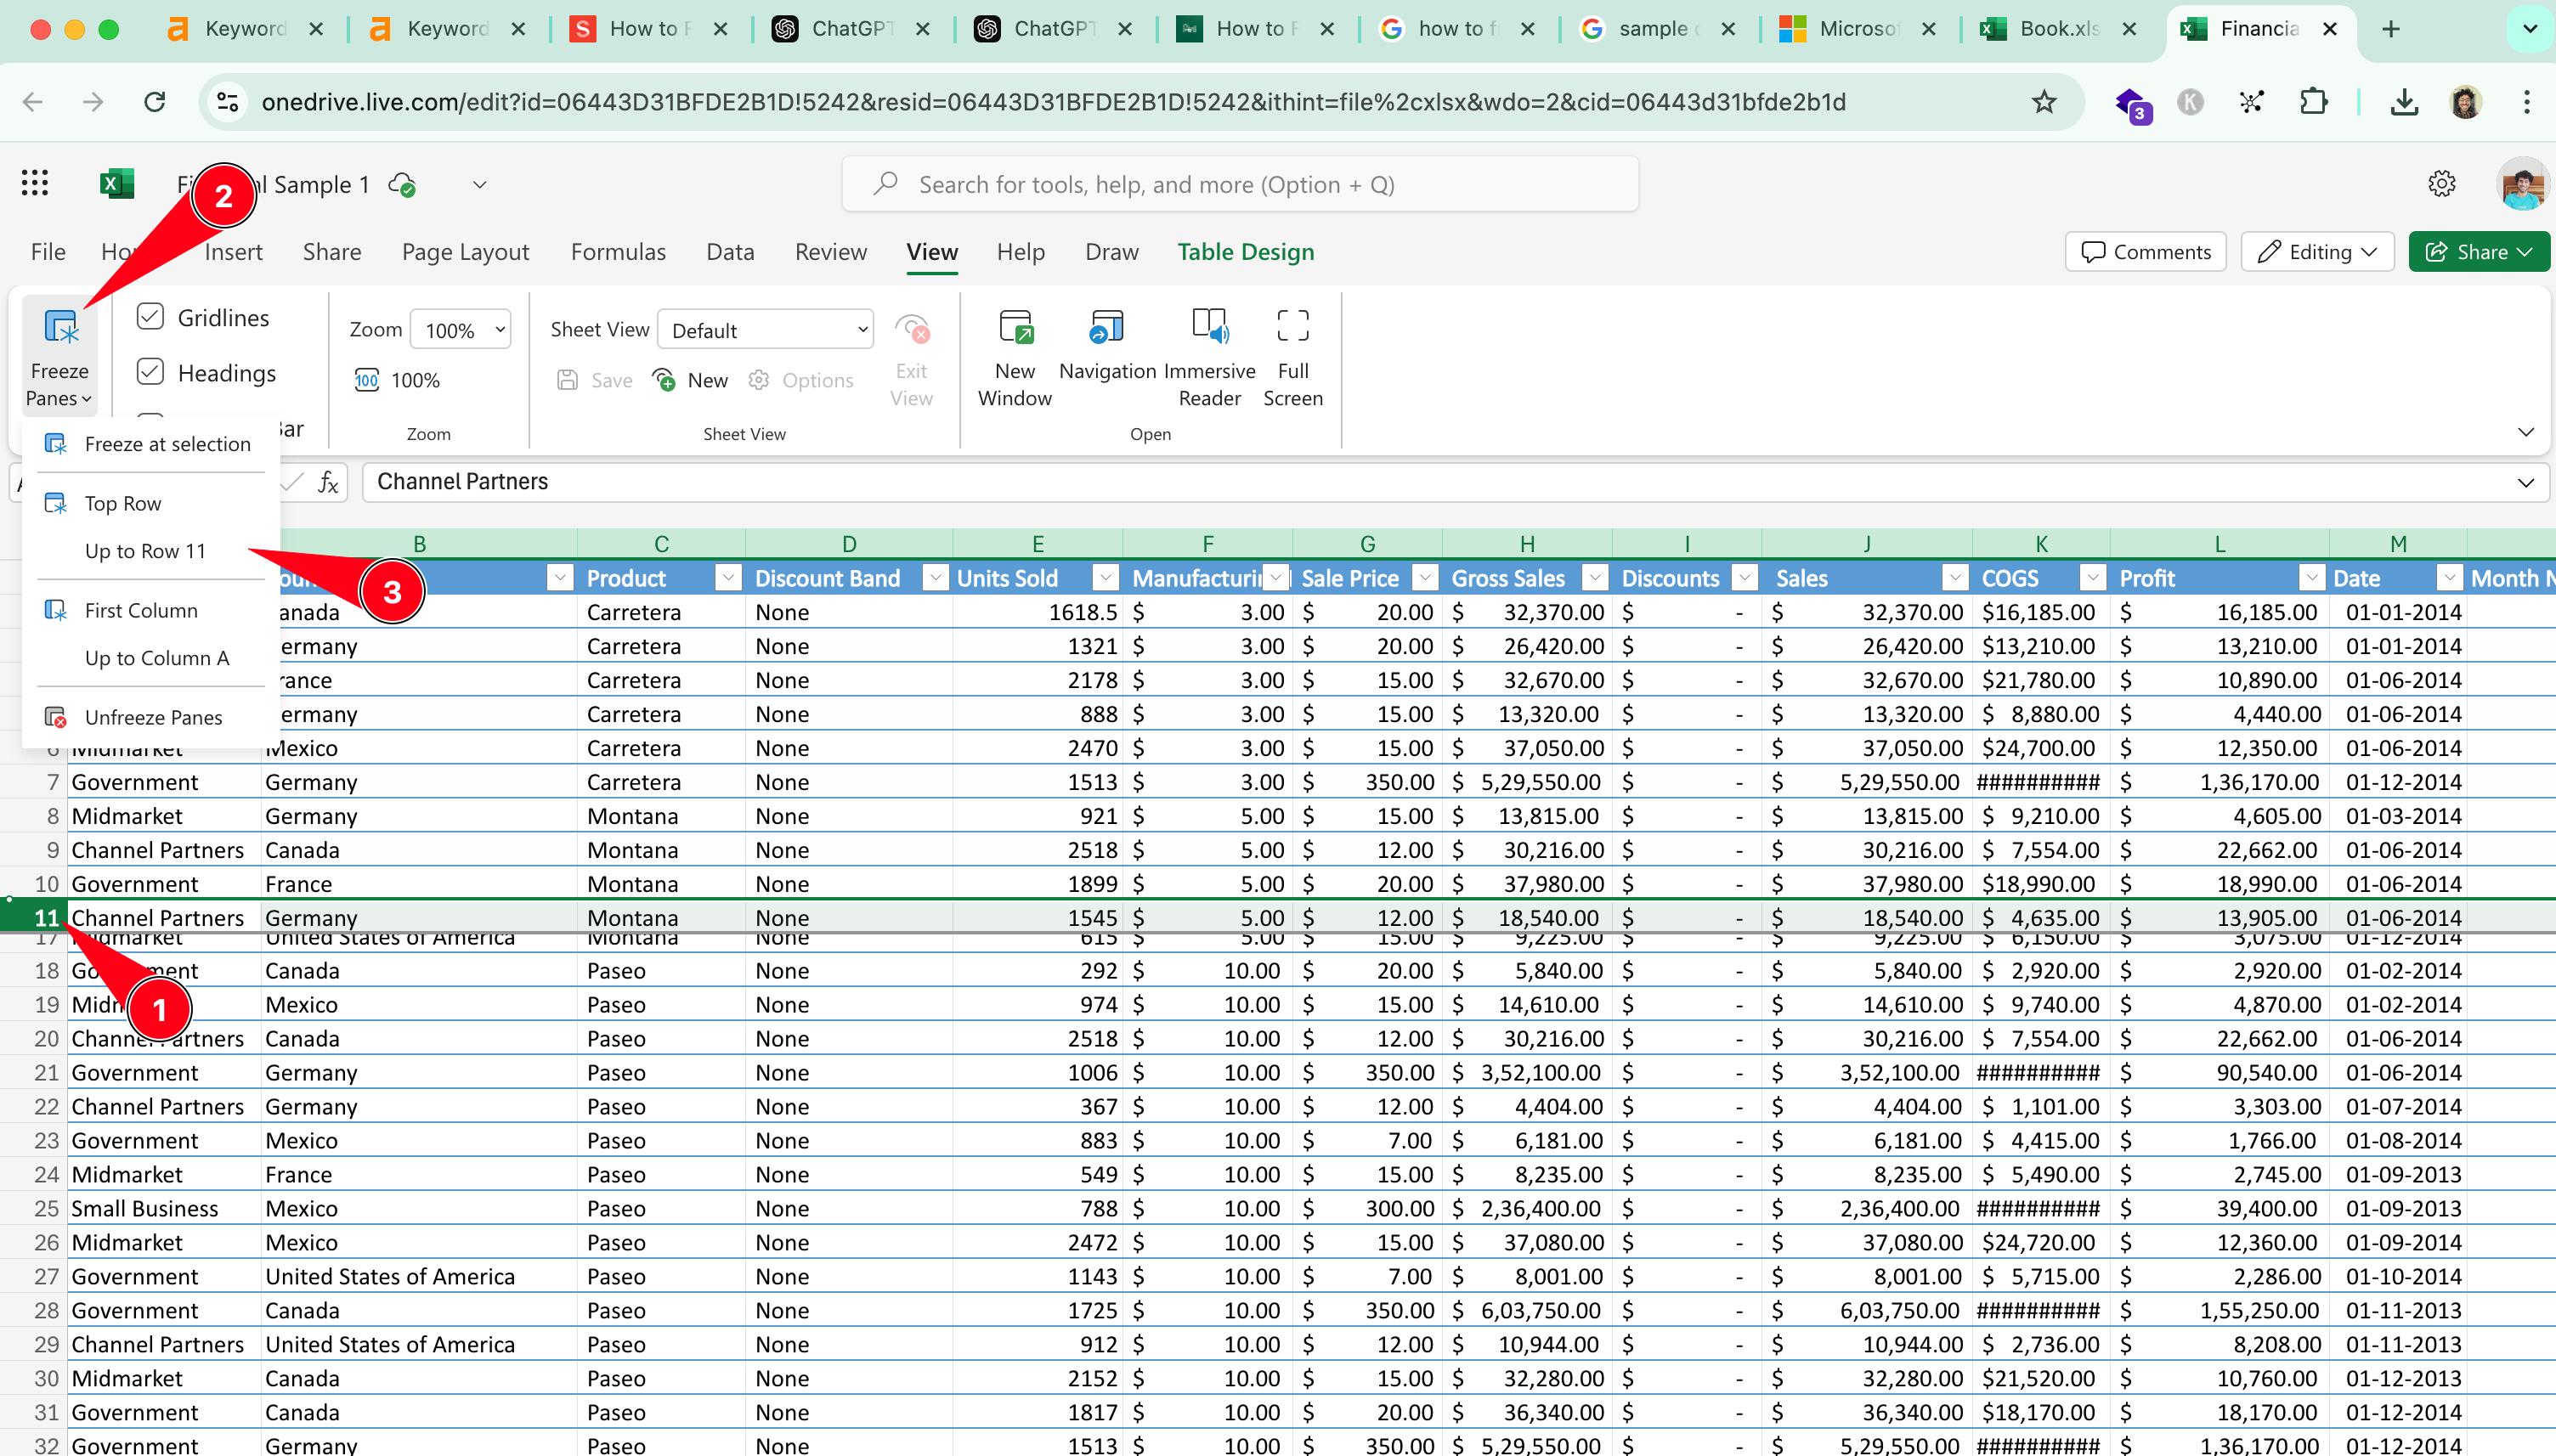
Excel Online has limited functionality compared to the desktop versions, but you can still freeze rows:
- Access the Worksheet: Open your file in Excel Online.
- Freeze Top Row: Go to View > Freeze Panes > Freeze Top Row.
- Freeze Columns: Similarly, select Freeze First Column if needed.
Freezing other rows is not supported in Excel Online at the moment.
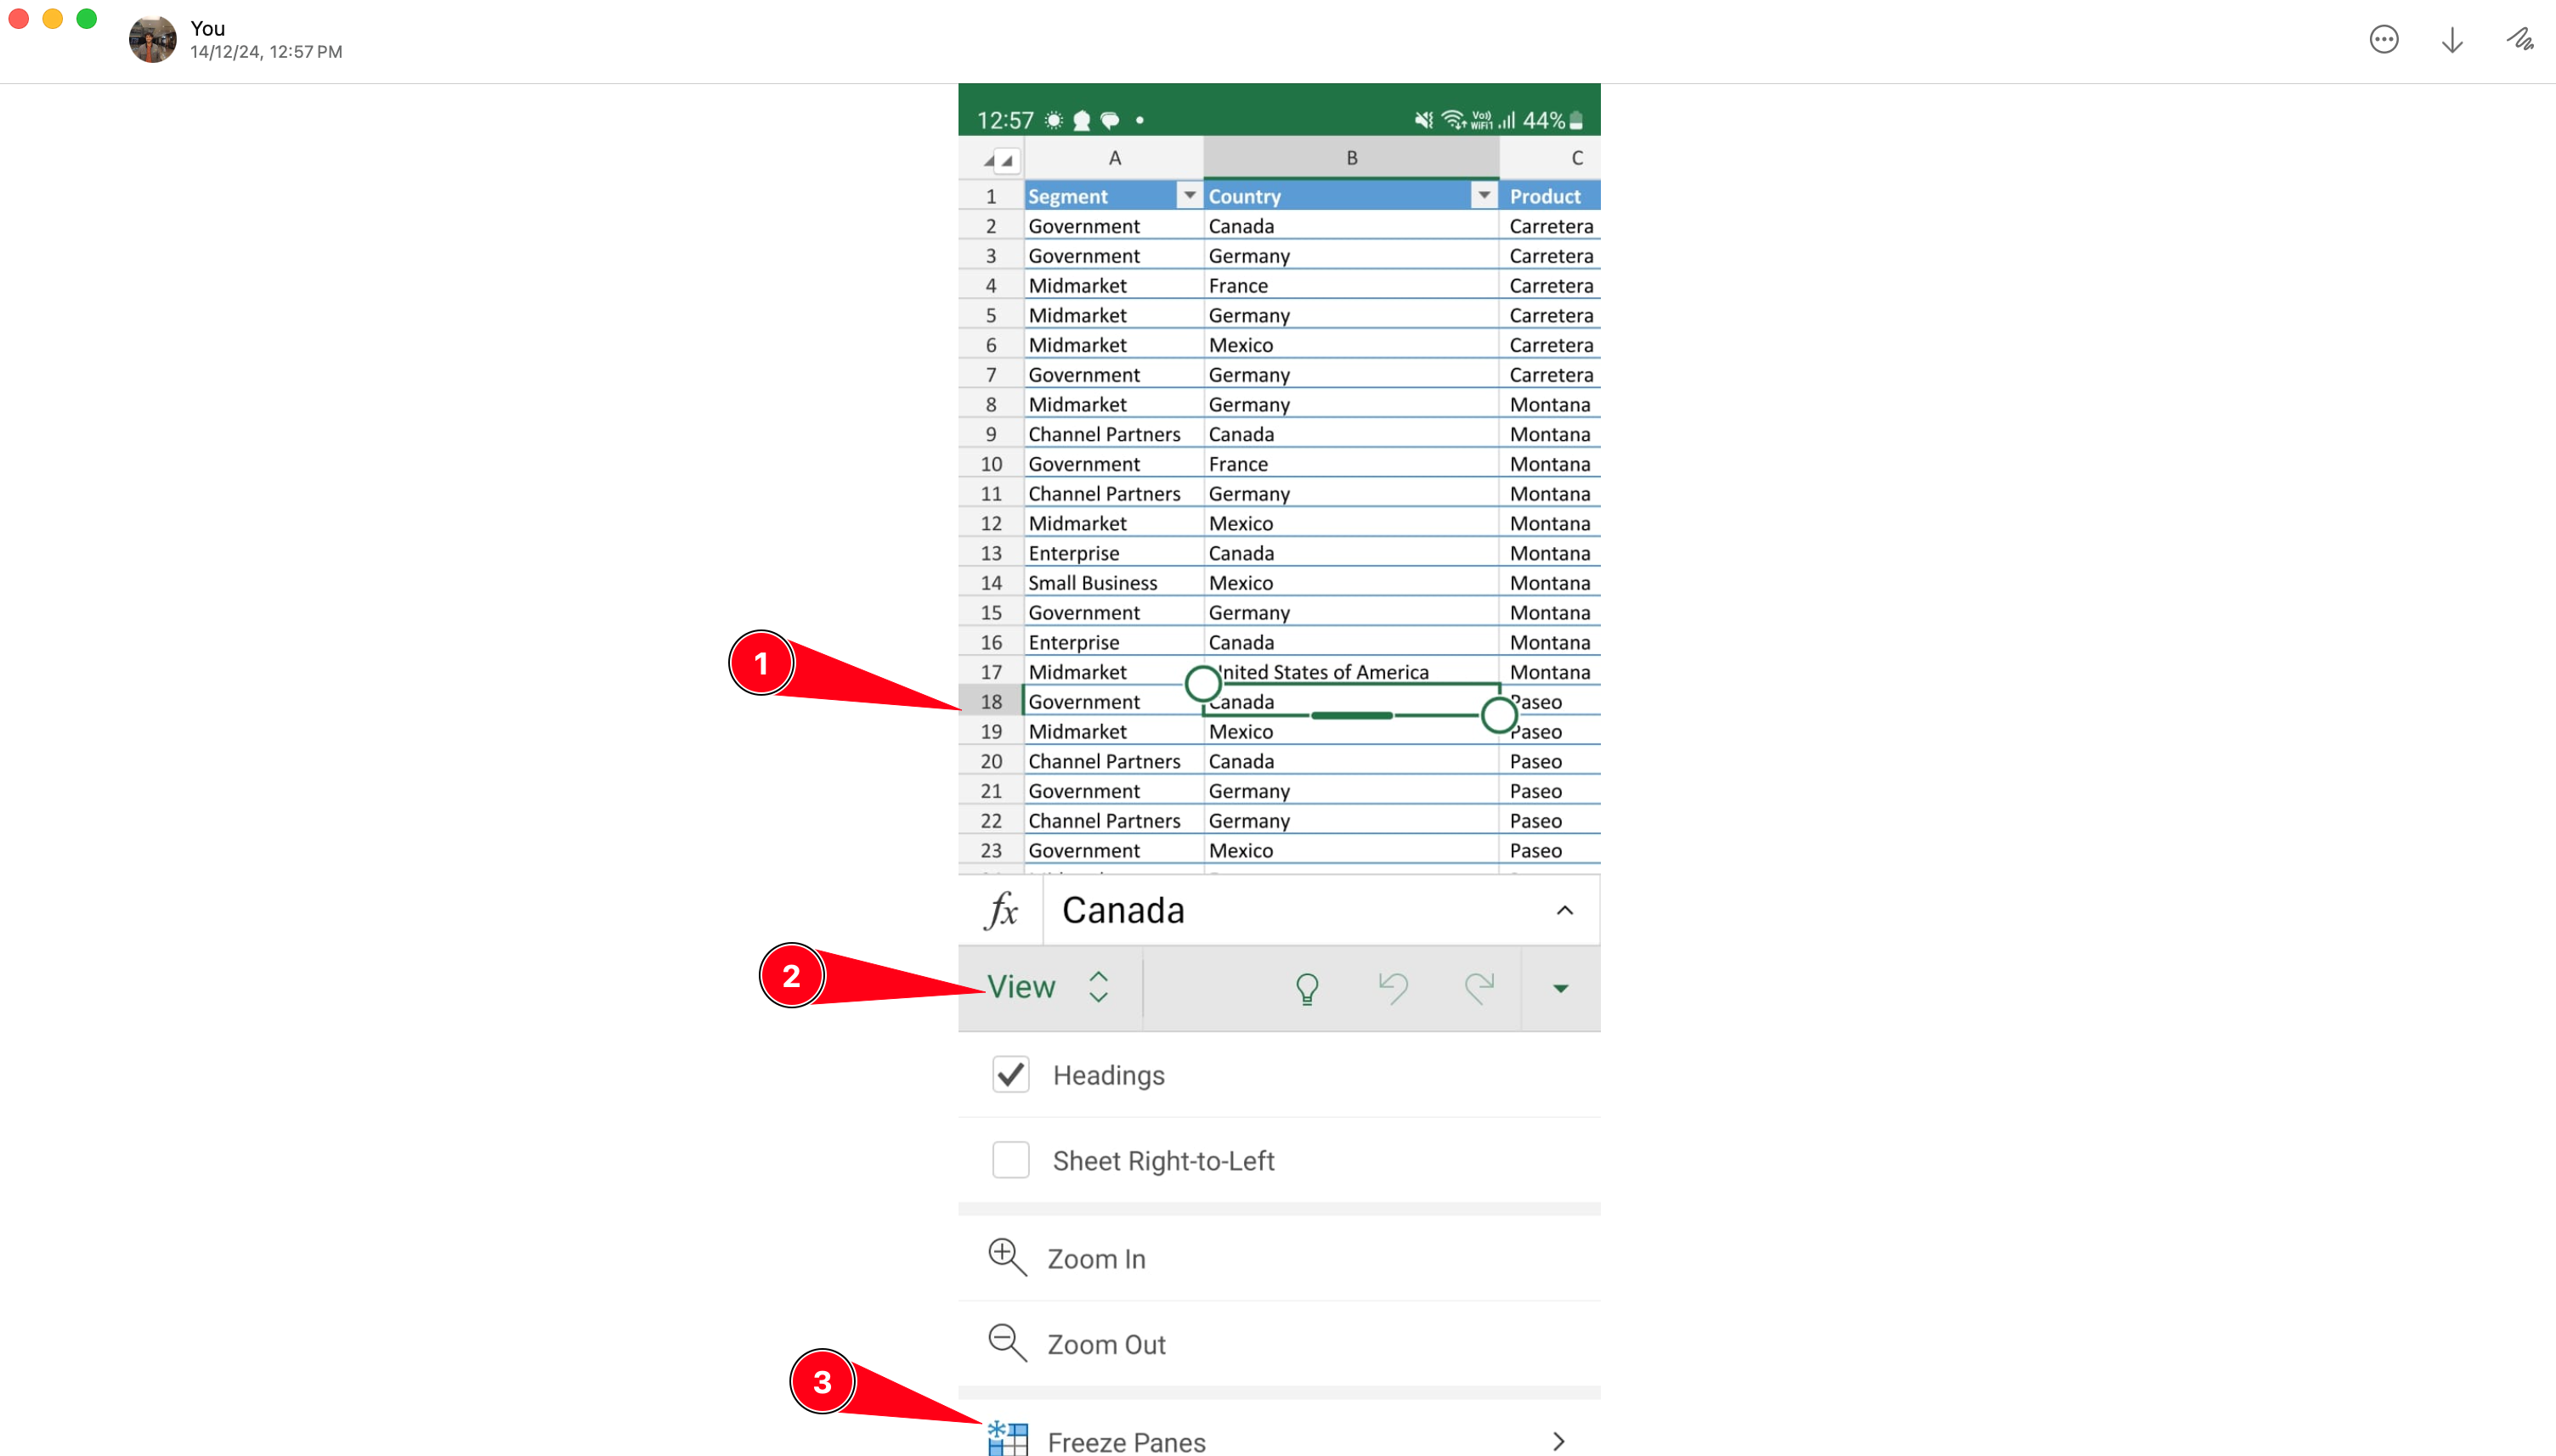
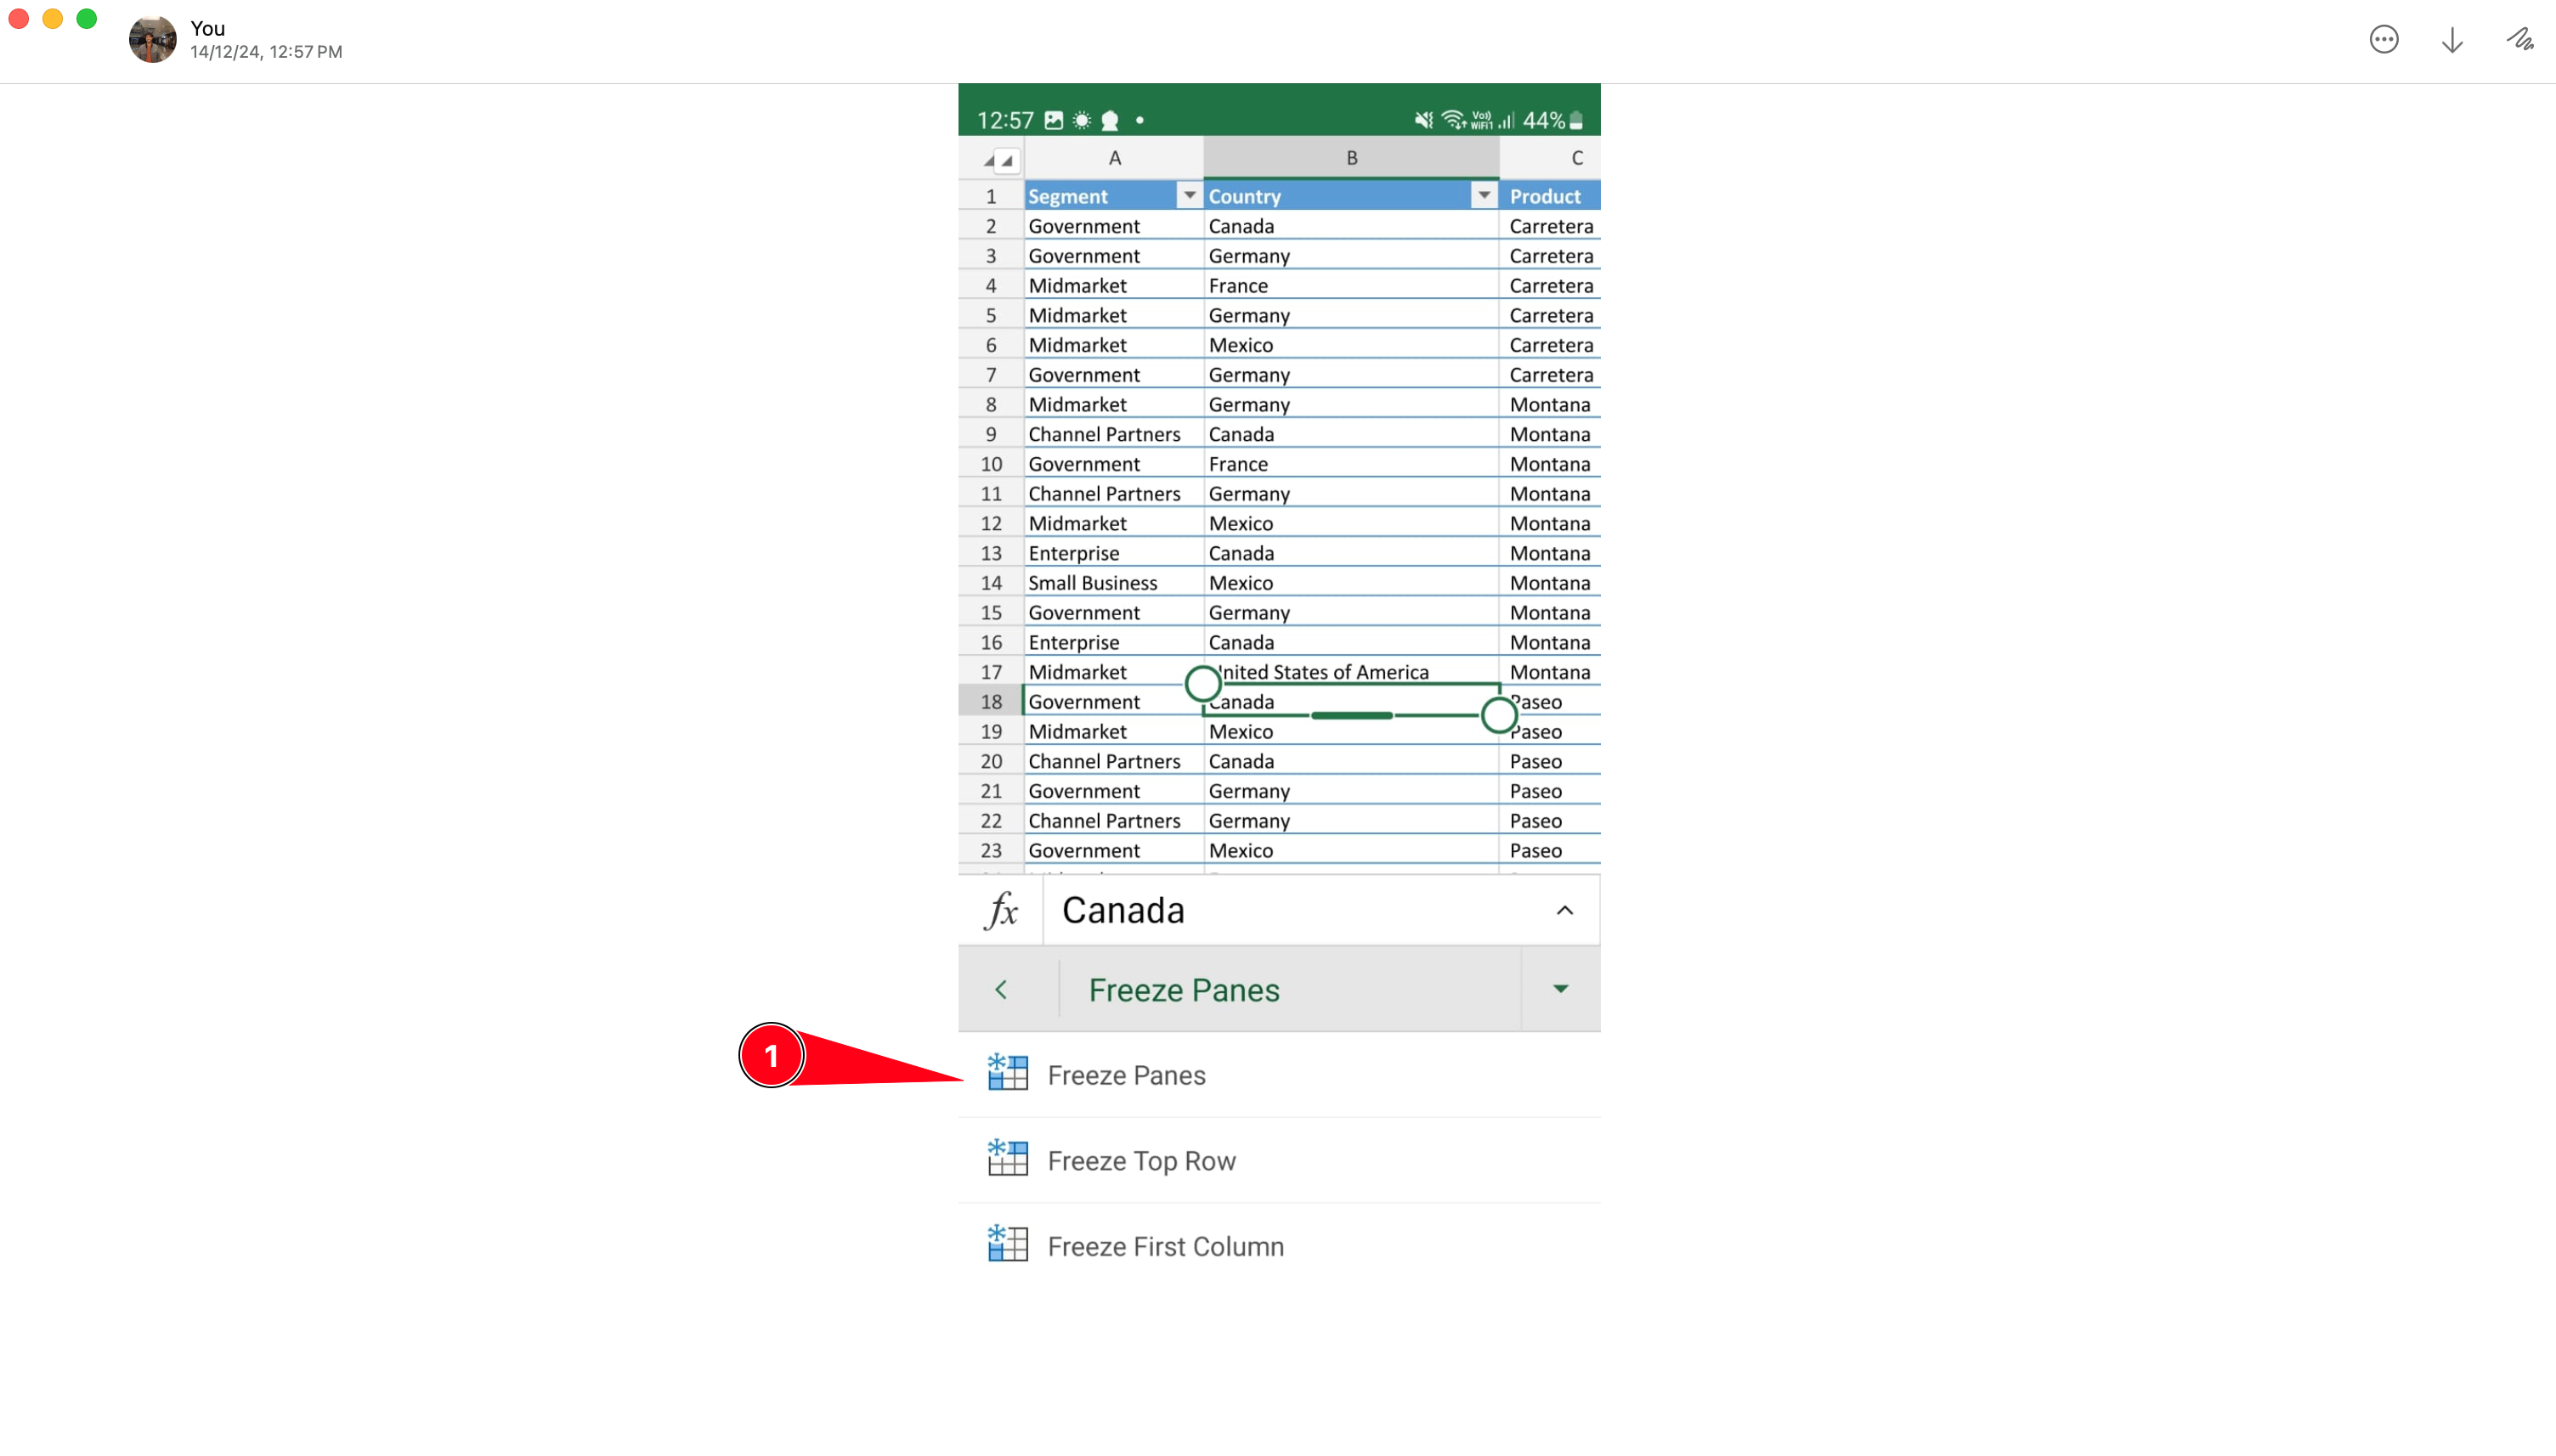
Freezing rows in Excel on Android is straightforward:
- Open the Excel App: Open your worksheet in the Excel app.
- Select a Row: Tap the row number below the row you want to freeze.
- Freeze Panes: Navigate to the menu (three dots), select View Options, and tap Freeze Panes.
This will keep the row visible while scrolling.
For iPhone or iPad users, freezing rows in Excel is similar to Android:
- Open Your File: Use the Excel app to access your worksheet.
- Highlight the Row: Tap the row number just below the one you wish to freeze.
- Freeze Panes: Access the menu, go to View Options, and choose Freeze Panes.
This locks the desired row in place.
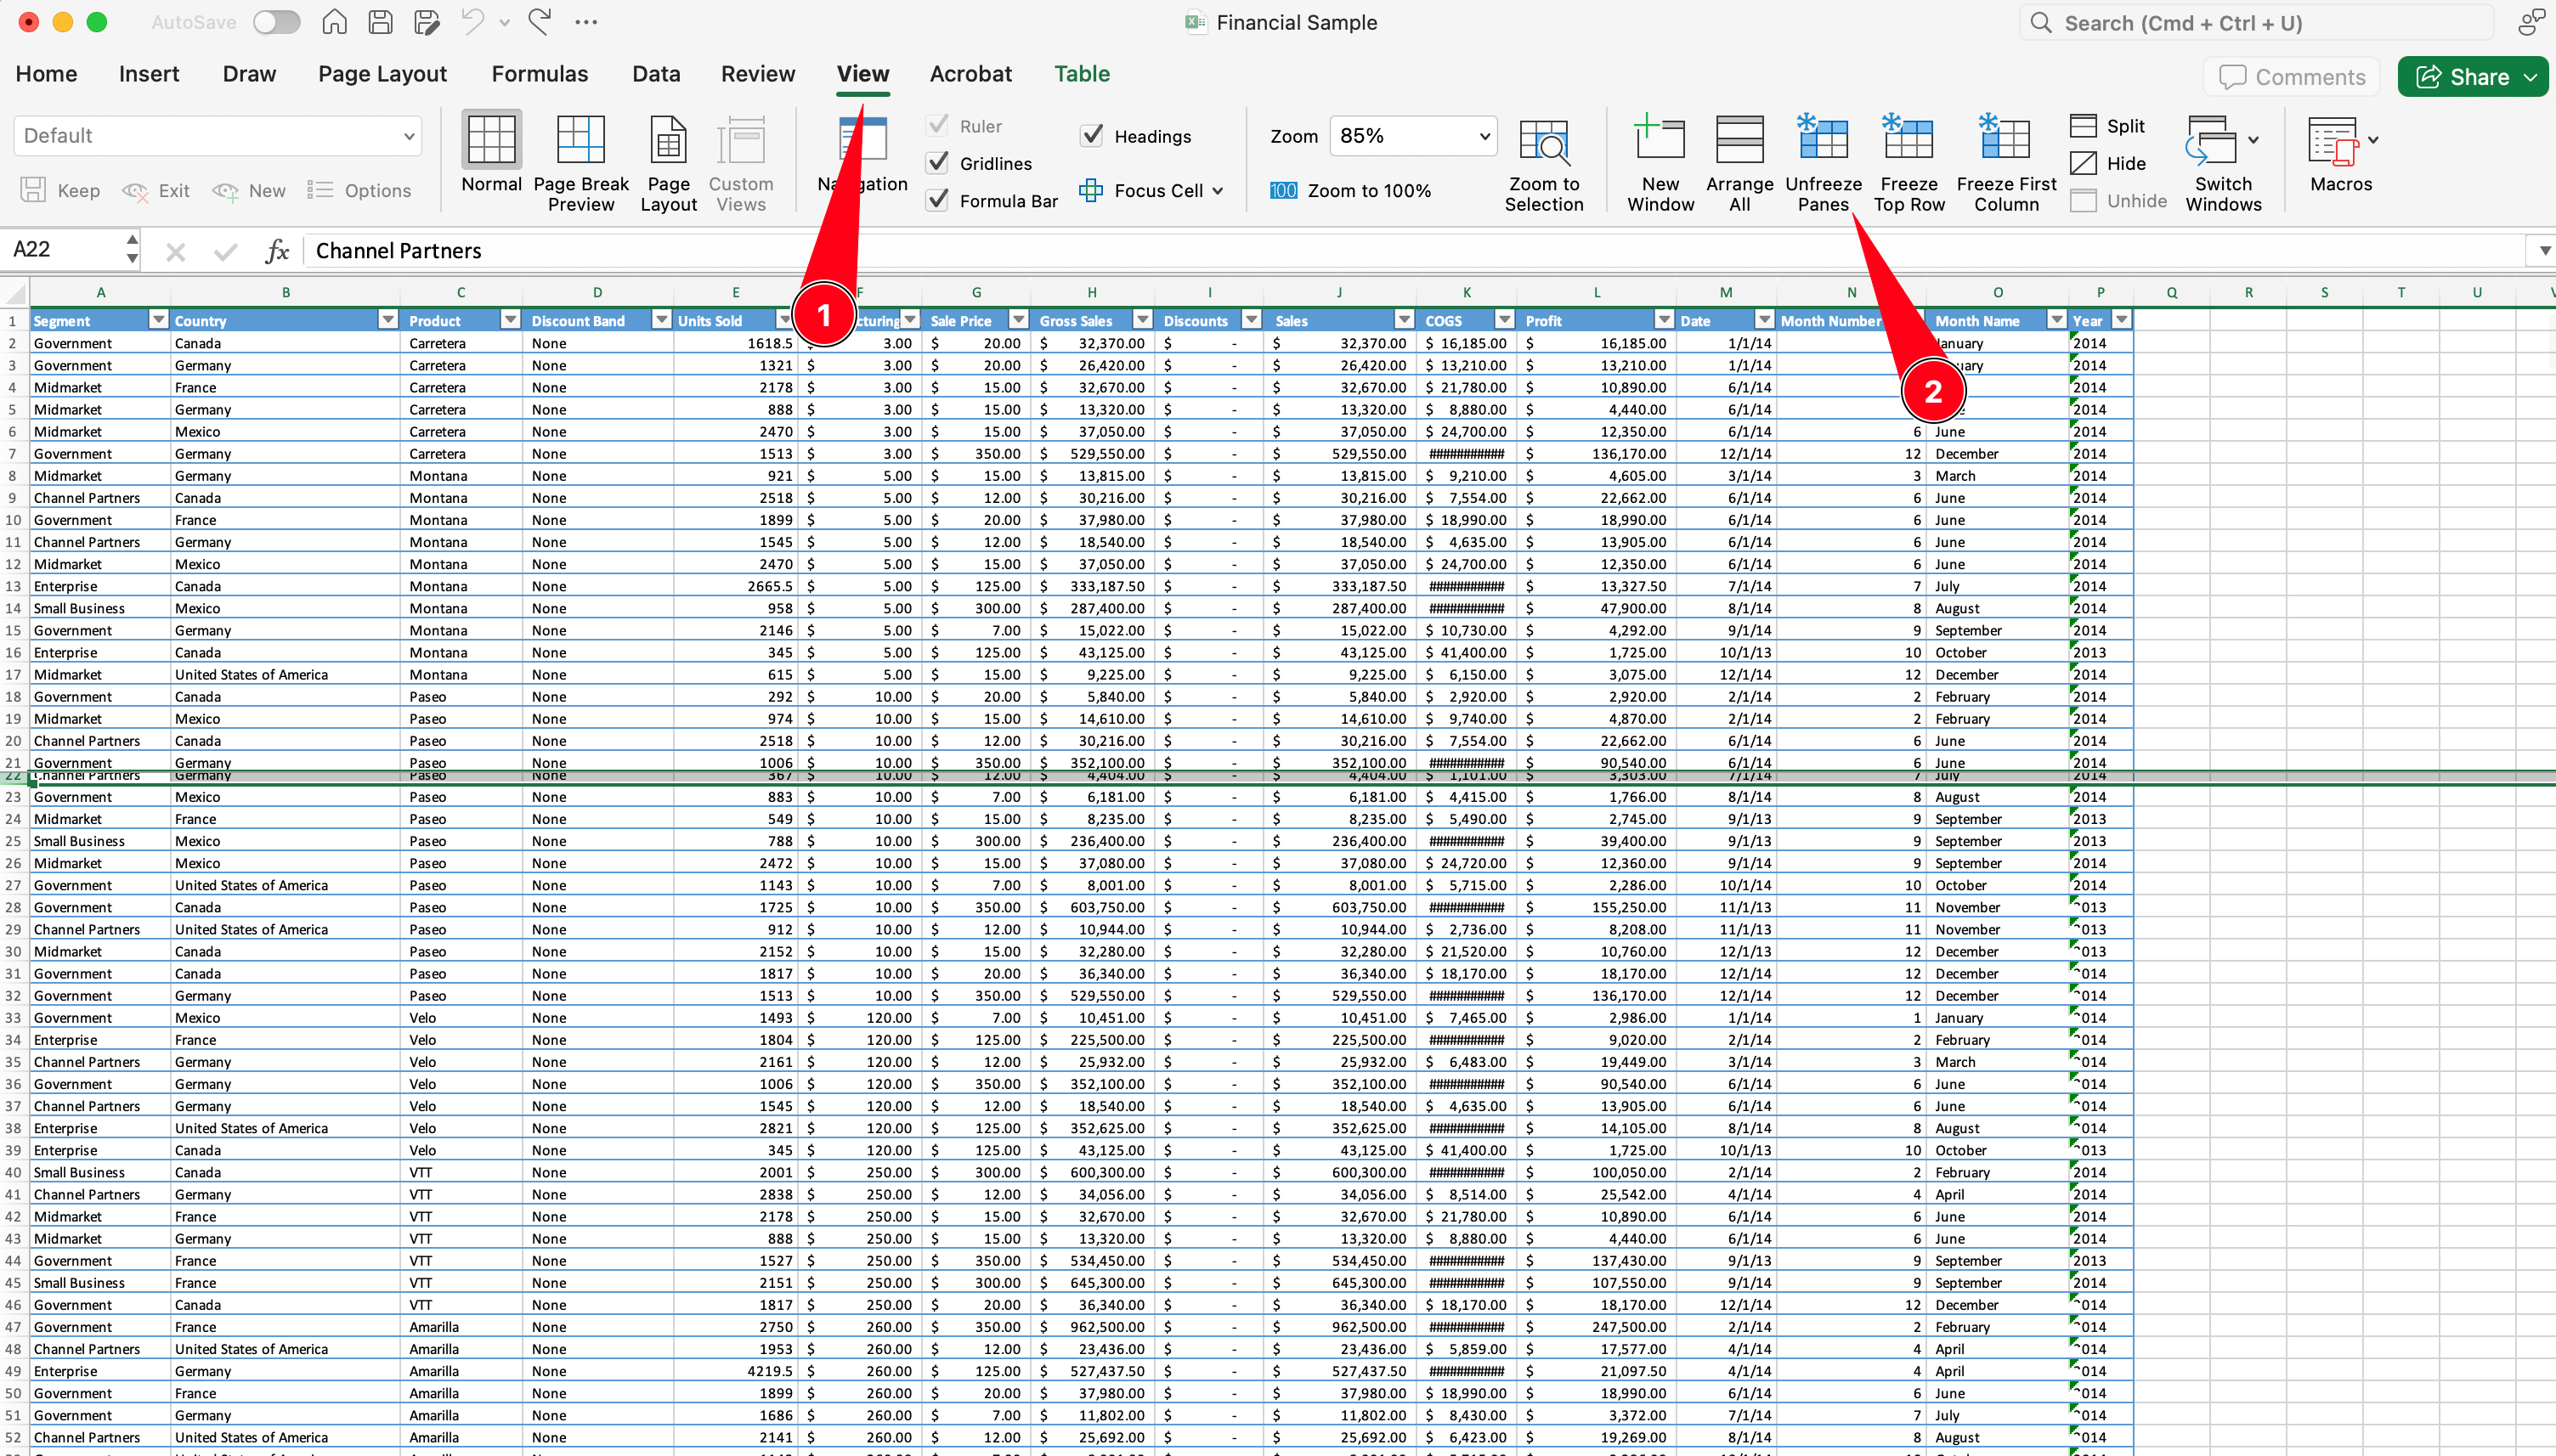
To unfreeze any frozen rows or columns:
- Go to View Tab: Click on the View tab in the ribbon.
- Unfreeze Panes: Select Freeze Panes and choose Unfreeze Panes.
This will remove any frozen rows or columns.
- Ensure that you’re not in cell editing mode.
- Check that your worksheet is not protected, as this may restrict certain features.
Freezing settings are saved with the workbook. When reopened, the same rows and columns will remain locked. This behavior is consistent across all platforms.
Freezing rows and columns in Excel simplify working with large datasets by keeping essential information in view. Whether you're on Windows, Mac, or Excel Online, the process is straightforward and improves efficiency.
Explore Excel's other features to enhance your productivity further!
